
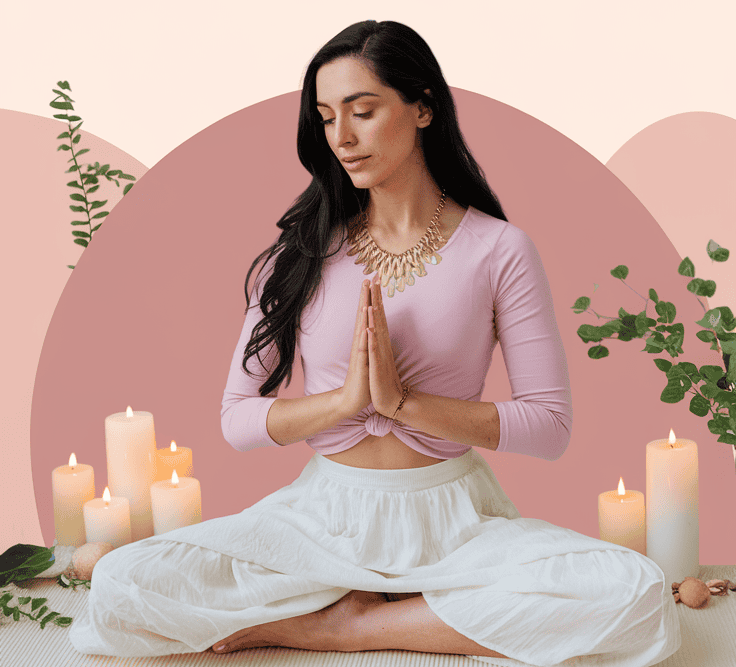
Fibromyalgia is a challenging condition characterized by chronic pain, fatigue, and muscle stiffness. Many people with fibromyalgia find that gentle movement—not strenuous exercise—helps ease their symptoms and improve their overall well-being.
Restorative yoga, with its emphasis on relaxation, support, and mindful breathing, can be an effective way to relieve pain and calm the nervous system.
In this guide, we explore 10 gentle restorative yoga poses designed specifically to soothe fibromyalgia pain, complete with detailed instructions, benefits, and tips to modify the poses for extra comfort.
Understanding Restorative Yoga for Fibromyalgia
Restorative yoga is a practice that focuses on deep relaxation rather than intense physical exertion. The poses are held for longer periods with the support of props such as bolsters, blankets, and blocks.
For those with fibromyalgia, this approach helps reduce muscle tension, ease chronic pain, and encourage a gentle release of stress.
Why It Works
- Gentle Stretching: Restorative poses gently stretch muscles without overexertion.
- Stress Reduction: Deep breathing and extended holds promote relaxation and lower cortisol levels.
- Supportive Environment: Props help maintain correct alignment and reduce the risk of injury.
- Mind-Body Connection: The focus on breathing and mindfulness can help manage both physical discomfort and emotional stress.
A key benefit for many is that restorative yoga is accessible to beginners and can be easily adapted to suit individual needs.

The 10 Gentle Restorative Yoga Poses
Below, each pose is described in detail. We include what you need to do, the benefits of fibromyalgia, and ideas for modifications with props. A table summary at the end offers a quick reference.
1. Supported Child’s Pose (Balasana)
How to Do It:
- Begin by kneeling on your yoga mat.
- Place a bolster or a couple of folded blankets in front of you.
- Sit back on your heels and gently lower your chest onto the support.
- Rest your forehead on the bolster or a soft cushion.
Benefits:
- Gently stretch the back and hips.
- Calms the mind and reduces stress.
- Eases muscle tension without strain.
Modifications:
- If kneeling is uncomfortable, sit on a chair and lean forward with your hands on your thighs.
2. Legs-Up-The-Wall Pose (Viparita Karani)
How to Do It:
- Sit close to a wall and lie on your back.
- Extend your legs upward so that they rest comfortably against the wall.
- Allow your arms to relax at your sides.
Benefits:
- Improves circulation in the legs.
- Relieves swelling and soothes leg pain.
- Promotes a calming effect, reducing overall fatigue.
Modifications:
- Place a folded blanket under your hips if you need extra cushioning.
3. Supine Bound Angle Pose (Supta Baddha Konasana)
How to Do It:
- Lie on your back with your knees bent.
- Bring the soles of your feet together, letting your knees fall open to the sides.
- Use cushions under your knees for additional support.
Benefits:
- Opens the hips and reduces tension in the lower body.
- Supports deep relaxation and a reduction in anxiety.
- Eases discomfort related to fibromyalgia.
Modifications:
- If your hips are tight, support your thighs with yoga blocks.
4. Reclining Twist (Supta Matsyendrasana)
How to Do It:
- Lie on your back and bend your knees.
- Gently let both knees fall to one side while keeping your shoulders flat on the mat.
- Hold for 30–60 seconds and switch sides.
Benefits:
- Releases tension in the spine.
- Enhances spinal flexibility without aggressive twisting.
- Relieves discomfort in the lower back.
Modifications:
- Keep your knees slightly bent if a full twist feels too intense.
5. Supported Bridge Pose (Modified Setu Bandha Sarvangasana)
How to Do It:
- Lie on your back with your knees bent and feet flat on the floor.
- Lift your hips gently and place a yoga block or cushion under your sacrum for support.
- Let the block hold the weight of your lower back while you relax.
Benefits:
- Strengthens the back and improves circulation.
- Provides gentle activation of the core muscles without strain.
- Soothes lower body discomfort and promotes relaxation.
Modifications:
- Use a thicker cushion if more support is needed.
6. Restorative Savasana with Props
How to Do It:
- Lie flat on your back in a comfortable position.
- Arrange blankets and bolsters so that your body is fully supported.
- Close your eyes and focus on deep, controlled breathing.
Benefits:
- Facilitates deep relaxation and mental calm.
- Allows the body to integrate the benefits of your yoga practice.
- Reduces overall stress and improves sleep quality.
Modifications:
- Adjust the number and position of props until you feel completely supported.
7. Reclined Seated Forward Bend (Modified Paschimottanasana)
How to Do It:
- Sit with your legs extended straight in front of you.
- Place a bolster or cushion on your thighs.
- Slowly lean forward, allowing the support to ease the stretch.
Benefits:
- Gently stretches the back and relieves muscle tightness.
- Encourages a calm and meditative state of mind.
- Improves flexibility in the spine and hamstrings.
Modifications:
- If reaching the bolster is difficult, use a yoga strap to bridge the gap.
8. Supported Cat-Cow Stretch
How to Do It:
- Start on your hands and knees.
- Place a cushion under your belly for added support.
- Inhale to arch your back (Cow Pose) and exhale to round your back (Cat Pose).
- Move slowly between the two positions.
Benefits:
- Increases spinal mobility and reduces stiffness.
- Eases tension in the back and neck.
- Promotes coordinated breathing with movement.
Modifications:
- If the traditional table-top position strains your wrists, perform the movement seated on a chair.

9. Restorative Warrior (Modified Variation)
How to Do It:
- Stand with your feet wide apart and use a chair or wall for balance.
- Slowly shift your weight, mimicking a gentle version of Warrior II.
- Focus on controlled, mindful movement rather than the depth of the pose.
Benefits:
- Enhances balance and builds gentle strength.
- Reduces stress by engaging both body and mind.
- Increases body awareness and stability.
Modifications:
- Keep one hand on the support at all times for added stability.
10. Mindful Breathing & Meditation Practice
How to Do It:
- Sit comfortably on a cushion or chair.
- Close your eyes and focus on deep, rhythmic breathing.
- Inhale deeply, fill your lungs, and slowly exhale.
- Continue for 5–10 minutes, letting go of any tension.
Benefits:
- Calms the nervous system and reduces cortisol levels.
- Enhances mental clarity and emotional balance.
- Complements physical practice by addressing stress and anxiety.
Modifications:
- Use guided meditation apps if you prefer auditory support.
Table of Pose Details
| Pose Name | Key Steps | Benefits | Props/Modifications |
|---|---|---|---|
| Supported Child’s Pose | Kneel, sit back, lower chest on the bolster | Stretches back & hips calms the mind | Use a chair if needed |
| Legs-Up-The-Wall Pose | Lie back, extend your legs against the wall | Improves circulation, eases leg pain | Folded blanket under hips for cushioning |
| Supine Bound Angle Pose | Lie back, soles together, knees fall open | Opens hips, relieves tension | Blocks under thighs for added support |
| Reclining Twist | Lie back, let your knees fall to the side | Releases spinal tension improves flexibility | Keep knees bent for a gentler twist |
| Supported Bridge Pose | Lie back, lift hips, rest on a block or cushion | Strengthens back, soothes lower body discomfort | Use thicker cushions if needed |
| Restorative Savasana | Lie flat, arrange props for support | Deep relaxation, stress reduction | Adjust props for maximum comfort |
| Reclined Seated Forward Bend | Sit, extend your legs, lean forward over the bolster | Stretches back & hamstrings calms the mind | Use a strap if reaching is difficult |
| Supported Cat-Cow Stretch | On hands & knees, cushion underbelly | Increases spinal mobility, eases stiffness | Do seated if wrist pain occurs |
| Restorative Warrior | Stand with support, mimic Warrior II | Enhances balance, builds gentle strength | Keep a hand on chair/wall for stability |
| Mindful Breathing & Meditation | Sit comfortably, focus on deep rhythmic breathing | Calms the nervous system, promotes mental clarity | Guided meditation audio can help |
Tips for a Successful Home Practice
Creating a dedicated space for your yoga practice can enhance your experience. Here are some tips:
- Set Up a Calm Environment:
Choose a quiet space with soft lighting and minimal distractions. Adding calming music or essential oils can make the space even more inviting. - Gather Essential Props:
Invest in a few key props—such as bolsters, blankets, and yoga blocks. You can also repurpose household items like firm pillows or folded towels to provide the support you need. - Practice Consistently:
Even a short daily practice can yield significant benefits. Start with 15–20 minutes and gradually extend the duration as your comfort increases. - Listen to Your Body:
Always modify poses if you feel discomfort. If a particular movement causes pain, try a gentler variation or take a break.
Additional Self-Care Tips for Fibromyalgia
While restorative yoga can be a powerful tool, consider complementing your practice with these self-care tips:
- Mindful Eating:
Focus on a balanced diet of fruits, vegetables, and lean proteins. Proper nutrition supports muscle recovery and overall health. - Hydration and Sleep:
Staying well-hydrated and ensuring you get enough restful sleep can significantly affect how you feel day-to-day. - Gentle Movement:
Incorporate other forms of gentle movement, such as walking or tai chi, to maintain mobility without overexertion. - Stress Management:
Engage in activities that reduce stress, such as journaling, listening to calming music, or simply taking quiet time for yourself. - Consult Professionals:
Regular check-ins with your healthcare provider or a yoga instructor specialized in therapeutic practices can help tailor your routine to your specific needs.
FAQs
Q: Is restorative yoga safe for everyone with fibromyalgia?
A: Yes, restorative yoga is generally safe because it uses gentle movements and props for support. However, it’s always best to consult with your healthcare provider before starting any new exercise routine.
Q: How long should I hold each pose?
A: Hold each pose for 30 to 60 seconds or as long as you feel comfortable. The goal is deep relaxation, not strain.
Q: Can I do these poses daily?
A: Absolutely! Regular practice can help reduce symptoms over time. Even a 15-20-minute session can be beneficial when done consistently.
Q: What if I can’t perform a particular pose?
A: Modify the pose with extra props or skip it if necessary. Listening to your body is key, and adaptations are encouraged to avoid discomfort.
Q: Do I need special yoga clothing or equipment?
A: Not at all. Comfortable clothing and a soft mat are enough to start. Props like blankets and cushions can be improvised from household items.
Q: How does breathing factor into these poses?
A: Breathing is central to restorative yoga. Deep, mindful breathing helps reduce tension, enhances relaxation, and connects the body and mind.
Conclusion
Restorative yoga offers a nurturing, gentle approach for those living with fibromyalgia. Incorporating these 10 poses into your daily routine can help ease chronic pain, reduce stress, and enhance your overall well-being.
Remember to create a comfortable space, use props as needed, and listen to your body throughout your practice. Restorative yoga can become a valuable tool in your self-care routine with consistency and care.
We hope this guide inspires you to try these poses and enjoy a more relaxed, pain-free day. Save this article for your next yoga session, and feel free to share your progress using our recommended tips. Namaste!
