
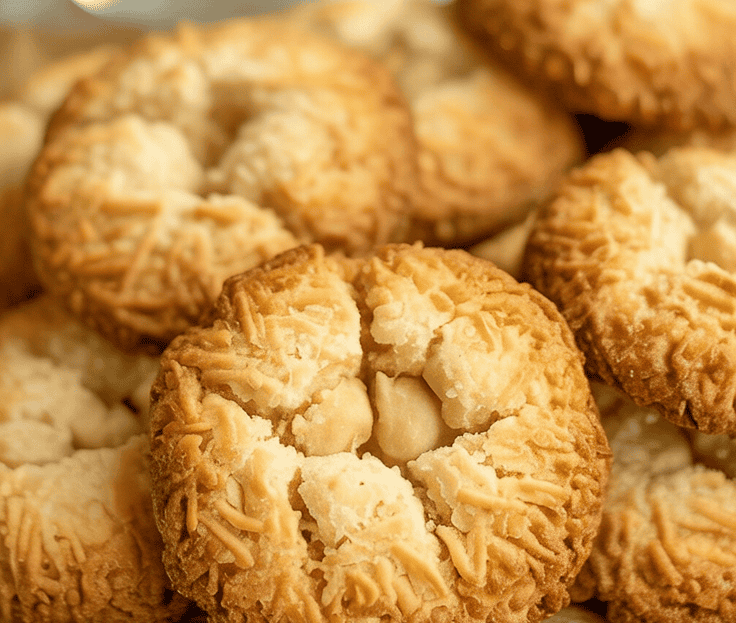
Hey friend! Yes, you—the one scrolling for a sweet fix without spiking your blood sugar or dealing with gluten drama. Let’s chat about a recipe I’ve been obsessed with lately: Sugar-Free Coconut Oat Cookies.
They’re diabetic-friendly, gluten-free, and taste downright delicious. Ready to swap that store-bought, sugar-loaded pack for something homemade and guilt-free? Cool. Let’s get to it.

Why Go Sugar-Free & Gluten Free?
You might wonder: Why should I bother making sugar-free, gluten-free cookies? Well, let me tell you why I started baking these beauties.
Health First, Y’all
I have a buddy (shoutout to Sarah!) who’s diabetic, and another (high-five, Mike!) who discovered he’s gluten intolerant last year. Watching them both struggle to find snack options that don’t taste like cardboard, I decided it was time to experiment.
Fast forward, and voilà—these cookies are a hit at every gathering. Plus, if you or someone you love is watching their blood sugar or needs to dodge gluten, this recipe has got you covered.
Flavor Without Compromise
Ever tried a “diet” cookie that tastes like a sad piece of chalk? Yeah, me too—no thanks. That’s why I focused on making these cookies rich, nutty, and chewy.
Coconut flakes add an island-vibe sweetness, while rolled oats bring that hearty, comforting texture. Trust me, nobody will suspect they’re actually healthy.
Diet Trends, Schmid Trends
I’m not here to preach about the latest health crazes—IMO, real food should be simple. But if you’re curious about low-carb or low-sugar living, these cookies fit right in.
They use alternative sweeteners (more on that below) and swap wheat flour for gluten-free oats, so they align with common dietary preferences. Are they magic? No. Are they tasty? Absolutely.
Key Ingredients Breakdown
Before we bake, we need a quick rundown of the stars of this show. Grab a notepad—or just remember this list, if you’re like me and lose sticky notes faster than socks in a dryer.
Rolled Oats (Certified Gluten Free)
- Why oats? They’re naturally hearty, full of fiber, and give a chewy bite.
- Gluten-free caution: Not all oats are created equal. Look for a label that says “Certified Gluten Free”. Otherwise, cross-contamination can happen in processing facilities.
- Nutrition boost: Oats pack a punch of soluble fiber (beta-glucan) that helps regulate blood sugar, so they’re perfect for diabetic-friendly recipes.
- Pro tip: If you like your cookies a bit crunchier, pulse half the oats in a blender for a finer texture.
Unsweetened Shredded Coconut
- Flavor: Adds natural sweetness and that tropical flair.
- Texture: Helps these cookies stay chewy yet slightly crisp on the edges.
- Nutritional note: Coconut provides healthy fats—plus a hint of medium-chain triglycerides (MCTs) for energy.
Sugar-Free Sweetener (Erythritol or Monk Fruit Blend)
- Why sugar-free? We’re avoiding glucose spikes, especially important for diabetics.
- Sweetener options:
- Erythritol: Zero calories, minimal aftertaste (IMO, it’s the MVP).
- Monk fruit blend: All-natural, zero calories, and usually mixed with erythritol to balance sweetness.
- FYI: Stevia can be used, but watch the bitterness. Always taste-test your chosen sweetener with a pinch of vanilla extract to ensure it suits your palate.
Almond Flour (Optional Extra)
- Why almond flour? If you want more protein and a slightly nuttier flavor, add ½ cup of almond flour. It also helps bind ingredients and adds richness.
- Gluten-free benefits: Naturally grain-free, so it complements our gluten-free goal.
- Substitution note: If you skip almond flour, just increase the oats by ½ cup.
Egg (or Flax Egg for Vegan)
- Binding agent: Holds everything together.
- Flax egg option: Mix 1 tablespoon ground flaxseed + 3 tablespoons water, let sit for 5 minutes. It works like a charm in vegan or egg-free versions.
Coconut Oil (or Unsalted Butter)
- Fat content: Fats deliver mouthfeel, moisture, and help the cookies hold shape.
- Coconut oil: Keeps it dairy-free; I love the extra coconut aroma.
- Unsalted butter: If dairy is OK, butter gives a classic cookie flavor.
Vanilla Extract, Salt, and Baking Soda
- Vanilla: A few drops of pure vanilla extract elevate flavor—never skip it.
- Salt: Enhances all other flavors; I use ¼ teaspoon of fine sea salt.
- Baking soda: ½ teaspoon for a slight lift; ensures cookies aren’t rock-hard.

Step-by-Step Baking Instructions
Alright, apron on—time to get baking. Grab a mixing bowl, spatula, and that baking sheet. Ready?
1. Preheat & Prep
- Preheat oven to 350°F (175°C).
- Line a baking sheet with parchment paper or a silicone mat. (Seriously, parchment paper is your best friend—no more cookie stick-fests.)
2. Mix the Dry Ingredients
- In a large bowl, combine:
- 2 cups of rolled oats (certified gluten-free)
- 1 cup of unsweetened shredded coconut
- ½ cup of almond flour (optional)
- ½ teaspoon of salt
- ½ teaspoon of baking soda
- Stir until everything looks evenly distributed—no giant clumps of coconut, please.
3. Cream the Fats & Sweetener
Have you ever tried creaming coconut oil and erythritol? It’s oddly satisfying—like making frosting.
- In a separate bowl, whisk together:
- ½ cup of coconut oil (softened but not melted)
- ½ cup of sugar-free sweetener (erythritol or monk fruit blend)
- Add 1 large egg (or flax egg) and 1 teaspoon of vanilla extract. Whisk until smooth and pale. Pro tip: If you skip this step and dump everything at once, you’ll end up with uneven sweetness. Trust me; I’ve learned the hard way.
4. Combine All Ingredients
- Pour the wet mixture into the bowl of dry ingredients.
- Stir with a spatula until fully combined. You want a slightly sticky dough that holds together when pressed.
- If it feels too dry, add 1–2 tablespoons of almond milk (or your favorite plant milk). If it’s too wet, sprinkle in a tablespoon of oat flour (just pulse oats in a blender for a few seconds).
5. Scoop & Shape
- Use a tablespoon or cookie scoop to portion dough.
- Place scoops about 2 inches apart on the prepared baking sheet.
- Gently press down each mound with your fingers or the back of a spoon to flatten slightly. We want cookie shapes, not little towers.
6. Bake & Cool
- Bake in the preheated oven for 10–12 minutes, or until the edges turn golden brown. Your kitchen will start to smell like a tropical vacation—just FYI.
- Remove from oven and let cookies cool on the baking sheet for 5 minutes. (If you try to transfer them right away, you’ll have a crumbly mess.)
- Transfer to a wire rack to cool completely. They firm up as they cool—patience, young grasshopper.
Tips & Tricks for Perfect Cookies
No one wants mushy or rock-hard cookies—am I right? Here are a few tried-and-true pointers.
Get the Texture Just Right
- Chewy vs. Crispy: For chewier cookies, underbake by 1 minute. For crispier edges, add an extra 1–2 minutes.
- Uniform Size: Use a cookie scoop to ensure even baking.
- Binding Issues: If your dough falls apart, check if you used enough fat (coconut oil/butter) and egg (or flax egg). A too-dry dough means crumbly cookies.
Sweetener Substitution Notes
- Erythritol-only: Minimal aftertaste, but can have a slight cooling effect—some people love it; others, not so much.
- Monk fruit blend: A bit more “honeysuckle” flavor—pairs beautifully with coconut.
- Xylitol: Another sugar alcohol; be cautious if you have pets—xylitol is toxic to dogs.
Flavor Variations
- Chocolate Chips: Stir in ½ cup of sugar-free chocolate chips for a mocha-coconut twist.
- Nuts & Seeds: Toss in ¼ cup of chopped almonds, pecans, or pumpkin seeds for extra crunch.
- Spices: Add a pinch of ground cinnamon or cardamom to make it cozy.
No-Bake Shortcut (Lazy Baker’s Edition)
- Mix all dry ingredients (oats, coconut, almond flour, salt).
- Stir in melted coconut oil, sweetener, and vanilla until dough forms.
- Press into cookie shapes—no oven required!
- Chill in the fridge for 30 minutes to firm up.
Pro? No turning on the oven. Con? They stay very soft, so only do this when you’re really lazy. 😉
Nutritional Benefits & Diabetic-Friendly Breakdown
Let’s be real: you didn’t click for apples and spinach facts. But since we’re aiming for a diabetic-friendly cookie, a quick peek at the numbers helps.
Macronutrient Snapshot (Per Cookie, Approximate)
- Calories: ~90 kcal
- Net Carbs: ~4–5 g (depends on sweetener choice)
- Fiber: ~2–3 g (thanks to oats and coconut)
- Protein: ~2 g
- Fat: ~7 g (mostly from coconut oil and almond flour)
Why This Recipe Works for Diabetics
- Low Net Carbs: Net carbs equal total carbs minus fiber. Fiber slows sugar absorption, so net carbs are what truly matter for blood sugar.
- High Fiber Content: Oats and coconut provide soluble and insoluble fiber, which helps stabilize blood sugar and promote satiety.
- Healthy Fats: Coconut oil and almond flour contain medium-chain triglycerides (MCTs) and monounsaturated fats that provide lasting energy without dramatic insulin spikes.
- Sugar-Free Sweeteners: Erythritol and monk fruit don’t raise blood sugar score!
Gluten-Free Perks
- Reduced Inflammation: If you’re gluten-sensitive, removing gluten can ease digestive woes and joint aches.
- Celiac-Friendly: Certified gluten-free oats ensure no contamination—no nasty reactions here.
- Digestive Comfort: The combination of oats, coconut, and almond flour is easier on the tummy for many folks, compared to traditional wheat-based cookies.
Storage, Shelf Life, and Freezing Hacks
Alright, you baked a batch—congrats! Now you have a tray of cookies begging to be eaten. But life happens, and sometimes you need to stash them for later. Here’s the lowdown.
Room Temperature
- Container: Store in an airtight container at room temp.
- Shelf Life: They stay fresh for 3–4 days. After that, they start to dry out (still edible, just less chewy).
Refrigeration
- Container: Airtight or zip-top bag.
- Shelf Life: Up to 10 days. They firm up in the fridge, so pop them out for 10 minutes before indulging if you want that chewy texture back.
Freezing for Future Munchies
- Cool Completely: Never freeze warm cookies—condensation wrecks texture.
- Layer cookies between sheets of parchment in a freezer-safe bag or container.
- Freeze for up to 3 months.
- When you need a fix, remove a few cookies and let them thaw at room temperature for 15–20 minutes. Or microwave for 10 seconds for that “freshly-baked” warmth.
Troubleshooting Common Issues
Baking can be tricky. If your cookies seem more like hockey pucks or oatmeal soup, check these pointers.
Cookies Too Crumbly
- Possible Culprit: Not enough moisture or fat.
- Solution: Double-check your egg (or flax egg) measurement. Add 1 tablespoon of almond milk if the dough feels too dry.
Cookies Spread Too Much
- Possible Culprit: Warm dough or too much coconut oil (or butter) that was melted instead of softened.
- Solution: Chill the dough for 10–15 minutes before scooping. Use chilled coconut oil, not melted.
Underbaked (Mushy Inside)
- Possible Culprit: Oven temperature might run low, or baking time was too short.
- Solution: Invest in an oven thermometer (seriously, you won’t regret it). Add 1–2 extra minutes, but watch closely.
Bitter Aftertaste
- Possible Culprit: Too much erythritol or low-quality vanilla extract.
- Solution: Taste-test your sweetener: dissolve a pinch in hot water—do you like the flavor? If not, try a monk fruit blend. Use pure vanilla extract, not “imitation.”

Frequently Asked Questions (FAQs)
Because I know you have questions. (Rhetorical time!)
Can I Replace Coconut Oil with Butter?
Absolutely. Butter adds a rich, classic cookie flavor. Make sure it’s unsalted so you can control the salt level. If you use salted butter, skip adding table salt in the dry mix.
Are These Cookies Vegan?
They can be! Use a flax egg instead of a chicken egg and ensure your sweetener is plant-based (most erythritol/monk fruit blends are fine). Double-check that your shredded coconut doesn’t have hidden dairy coatings—rare, but possible.
Can I Add Chocolate Chips?
Sure thing, chocoholic. Stir in ½ cup of sugar-free chocolate chips after you combine wet and dry ingredients. Cookies become way more decadent—just monitor the baking time, as chips can speed up the browning.
What’s the Best Sweetener for Diabetics?
I lean toward erythritol, since it has a minimal impact on blood sugar and almost no aftertaste. Monk fruit blends are a solid second if you like a slightly fruitier sweetness. Honestly, taste both and decide which you prefer—everyone’s taste buds differ.
Why You’ll Love These Cookies
Look, I won’t claim these cookies are a cure-all. But they check a lot of boxes:
- Diabetic-friendly: No blood sugar rollercoaster.
- Gluten free: Safe for celiacs and gluten-sensitive pals.
- High-fiber: Keeps you full longer—so you’re less likely to snack out of boredom.
- Quick & Easy: From mixing bowl to oven in under 15 minutes.
- Versatile: Add-ins galore (chocolate chips, nuts, spices—you pick).
- Make-Ahead Friendly: Freeze for rainy-day cravings.
Ever thought a cookie could help you manage health goals? Me neither—until I made these. Now, I’m basically handing them out to anyone who enters my kitchen like I’m Oprah: “You get a cookie! You get a cookie!”
Final Thoughts & Call to Action
So there you have it: your go-to recipe for Sugar-Free Coconut Oat Cookies that are both diabetic-friendly and gluten-free. If I’ve convinced you to give these a whirl, I dare you to bake a batch this afternoon and see how quickly they disappear—no judgement if you end up eating half the tray yourself. 😉
Remember, small recipe swaps can make a big difference. Instead of reachin’ for a sugar-laden bar, whip up a few of these and pat yourself on the back for making a smart choice. And hey, once you master this base recipe, feel free to experiment: cinnamon, nutmeg, dark cocoa, maybe even a sprinkle of chili powder if you’re feeling adventurous. The world (and your cookie jar) is your oyster—or should I say, your coconut?
Go forth, bake, and enjoy. Then come back here and tell me how they turned out. Did your cookies come out perfect? Slightly overdone in the middle? I want all the deets. Because once you taste these, I can guarantee you’ll be telling every friend, neighbor, and random Facebook acquaintance: “Hey, you’ve gotta try these cookies—they’re life-changing.” 😉
Happy baking, friend. Your blood sugar (and taste buds) will thank you.
P.S. If you have any twists—like adding espresso powder or swapping in chia seeds—drop a comment below or send me a message. I’m always on the lookout for new cookie hacks!