
Hip pain is a common issue that can affect anyone—from office workers who spend long hours sitting to active individuals recovering from injuries.
Incorporating a daily stretching routine can help improve mobility, reduce discomfort, and even prevent further injury.
This article presents nine simple stretches you can do at home to ease hip pain, along with their benefits and key tips for safe practice.
Quick Summary Table
| Stretch Name | Primary Muscle Target | Key Benefit |
|---|---|---|
| Butterfly Stretch | Inner thighs & hips | Enhances hip flexibility and relieves tightness |
| Hip Flexor Stretch | Hip flexors | Reduces lower back tension and improves posture |
| Figure-Four Stretch | Glutes and piriformis | Eases sciatic discomfort by relieving glute tension |
| Seated Forward Fold | Hamstrings and lower back | Promotes overall flexibility and soothes tight muscles |
| Lying Hip Rotation | Hips and lower back | Increases rotational mobility and eases tension |
| Standing Quad Stretch | Quadriceps and hip flexors | Alleviates anterior hip tightness and improves balance |
| Child’s Pose | Hips, thighs, and lower back | Encourages relaxation and gently stretches the hips |
| Pigeon Pose | Gluteal muscles and hips | Opens the hip joints and alleviates deep-seated tension |
| Side Leg Raises | Hip abductors | Strengthens hip muscles for better stability |
1. Butterfly Stretch
What It Is
The Butterfly Stretch is a gentle seated stretch that focuses on the inner thighs and hips. To perform this stretch, sit on the floor with your feet pressed together and your knees bent outward. Hold your feet with your hands and gently press your knees toward the ground.
Benefits
- Improved Hip Flexibility: Helps open up the hip joint.
- Reduced Tightness: Releases tension in the inner thigh muscles.
- Ease of Practice: Perfect for beginners and can be done anywhere.
Tips
- Keep your back straight to maximize the stretch.
- Breathe deeply; exhale as you press your knees gently downward.
- Hold the stretch for 30 seconds and repeat two to three times.

2. Hip Flexor Stretch
What It Is
The Hip Flexor Stretch targets the muscles at the front of your hip. Start by kneeling on one knee with the other foot in front, forming a 90-degree angle at both knees. Keeping your back straight, slowly push your hips forward until you feel a stretch in the front of your hip.
Benefits
- Reduces Lower Back Pain By relieving tension in the hip flexors.
- Enhances Posture: A flexible hip flexor helps maintain a healthy spine alignment.
- Boosts Range of Motion: Prepares your hips for other physical activities.
Tips
- Ensure your knee remains directly above your ankle to avoid strain.
- Do not force the stretch—let your body ease into it.
- Hold on each side for 20-30 seconds, and repeat as needed.
3. Figure-Four Stretch
What It Is
Also known as the “Piriformis Stretch,” the Figure-Four Stretch is done lying on your back. Bend both knees, then place one ankle over the opposite knee, forming a figure “4.” Gently pull the supporting thigh toward your chest.
Benefits
- Relieves Gluteal Tension: Reduces discomfort in the buttocks and hip region.
- Eases sciatic pain: Helps alleviate pressure on the sciatic nerve.
- Improves Lower Body Flexibility: Beneficial for runners and desk workers alike.
Tips
- Keep your shoulders relaxed and flat on the floor.
- Move slowly to avoid sudden jerks that might irritate the sciatic nerve.
- Hold each side for 30 seconds and repeat two times.
4. Seated Forward Fold
What It Is
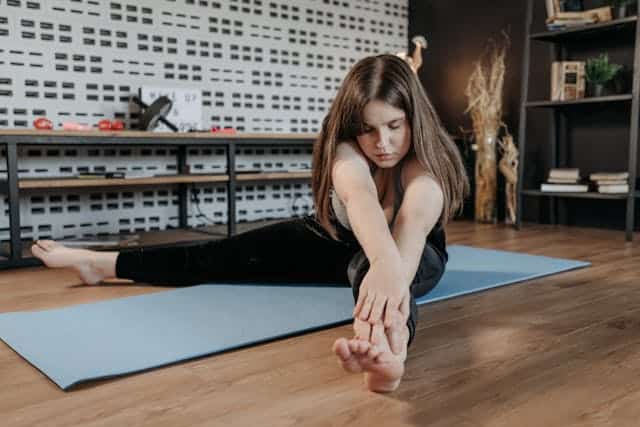
This stretch is excellent for the hamstrings and lower back and supports your hips. Sit with your legs extended straight in front of you. Slowly lean forward, reaching for your toes, and maintain a straight back.
Benefits
- Enhanced Flexibility: Improves the range of motion in your legs and lower back.
- Relieves Lower Back Stiffness: Soothes tight muscles contributing to hip discomfort.
- Calming Effect: The forward bend can help relax your mind and body.
Tips
- Keep your knees slightly bent if you feel too much strain.
- Use a towel or yoga strap around your feet to help reach them comfortably.
- Breathe slowly and deeply as you hold the stretch for 30-45 seconds.
5. Lying Hip Rotation
What It Is
The Lying Hip Rotation is a simple yet effective stretch that increases the mobility of your hips and lower back. Lie on your back with your knees bent and feet flat on the floor.
Slowly lower both knees to one side while keeping your shoulders on the floor, then return to the center and repeat on the opposite side.
Benefits
- Increased Rotational Mobility: Promotes fluid movement in your hip joints.
- Reduced Tension: Eases tightness along the lower back.
- Gentle Stretch: Ideal for warming up before more strenuous exercises.
Tips
- Move slowly to ensure your back remains flat on the floor.
- Hold each side for about 20-30 seconds.
- Repeat the stretch 2-3 times per side for best results.
6. Standing Quad Stretch
What It Is
A classic stretch, the Standing Quad Stretch is performed while standing. Simply pull one ankle toward your buttocks, keeping your knees close together. Use a wall or chair for support if necessary.
Benefits
- Targets the Quadriceps: Reduces tension in the muscles at the front of the thigh.
- Improves Hip Flexibility: Eases tightness around the hip area.
- Enhances Balance: Promotes stability by engaging the core and lower body muscles.
Tips
- Stand tall and engage your core to maintain balance.
- Hold each stretch for 20-30 seconds.
- Alternate sides and repeat two to three times for a balanced stretch.
7. Child’s Pose
What It Is
Child’s Pose is a restorative yoga position that gently stretches the hips, thighs, and lower back. Begin by kneeling on the floor, sit back on your heels, and then extend your arms forward while lowering your torso to the ground.
Benefits
- Relaxation: Promotes a deep sense of calm and relaxation.
- Gentle Stretch: Eases tension in the back and hips without strain.
- Mind-Body Connection: Encourages mindfulness and deep breathing.
Tips
- Adjust your distance from your heels to find a comfortable stretch.
- Use a cushion under your chest if you need additional support.
- Hold the pose for 30-60 seconds, focusing on your breathing.
8. Pigeon Pose
What It Is
Pigeon Pose is a deeper stretch that opens the hip joints and targets the gluteal muscles. Bring one knee forward and extend the opposite leg straight back from a kneeling position. Slowly lower your torso toward the front leg to deepen the stretch.
Benefits
- Deep Hip Opening: Significantly improves flexibility in the hip joints.
- Releases Muscle Tension: Particularly effective for relieving deep-seated tightness.
- Improves Circulation: Increases blood flow to the hip area, aiding in recovery.
Tips
- Use a folded blanket or cushion under your hips if you have tight muscles.
- Keep your front foot flexed to protect the knee joint.
- Breathe deeply and hold the pose for 30-45 seconds before switching sides.
9. Side Leg Raises
What It Is
Side Leg Raises are dynamic exercises that stretch and strengthen the hip abductors. Lie on one side with your legs straight. Slowly lift the top leg to about a 45-degree angle, then lower it back down. Repeat on the opposite side.
Benefits
- Strengthens Hip Muscles: Improves hip stability and balance.
- Prevents Injury: A strong hip musculature reduces the risk of strains.
- Complements Flexibility: Works well in combination with static stretches.
Tips
- Keep your movements slow and controlled to maximize muscle engagement.
- Perform 10-15 repetitions on each side.
- If you feel discomfort, reduce the range of motion gradually.
FAQs
Q: How often should I perform these stretches?
A: Aim for a daily routine, performing each stretch for 20-45 seconds, and repeat 2-3 times per stretch. Consistency is key for lasting relief.
Q: Can these stretches help with chronic hip pain?
A: Yes, they can help alleviate chronic hip pain by improving flexibility and strengthening supporting muscles. However, always consult with a healthcare provider if your pain persists.
Q: Should I warm up before stretching?
A: Before stretching, a light warm-up, such as a 5-minute walk or gentle movement, can help increase blood flow and reduce the risk of injury.
Q: Can I do these stretches if I have a hip injury?
A: These stretches are generally safe, but if you have an injury, it’s best to consult with a doctor or physical therapist for tailored guidance.
Q: How long will it take to see improvements?
A: You might notice improved mobility and reduced discomfort within a few weeks of regular practice. Individual results vary based on consistency and underlying conditions.
Additional Tips and Safety Advice
- Listen to Your Body: If stretching causes sharp pain or discomfort, stop immediately and adjust your position.
- Stay Hydrated: Drinking water before and after stretching can help your muscles recover and reduce stiffness.
- Combine with Strength Training: While these stretches improve flexibility, combining them with strength exercises can enhance overall hip stability.
- Maintain Proper Form: Correct posture and alignment are crucial. If you’re new to these stretches, consider watching a video tutorial or seeking professional advice to ensure you’re doing them correctly.
Conclusion
Incorporating these nine simple stretches into your daily routine can be a game-changer for alleviating hip pain.
Dedicating just a few minutes each day to these exercises can improve your hip flexibility, reduce discomfort, and enhance your overall mobility.
Remember, consistency and mindful practice are key. Always listen to your body and consult with a professional if you’re unsure about any new exercise routine.
You’re taking proactive steps toward a healthier, more flexible body by following the guidance provided here—from the Butterfly Stretch to Side Leg Raises. Enjoy the process, and embrace the relief of a well-stretched, pain-free hip.
