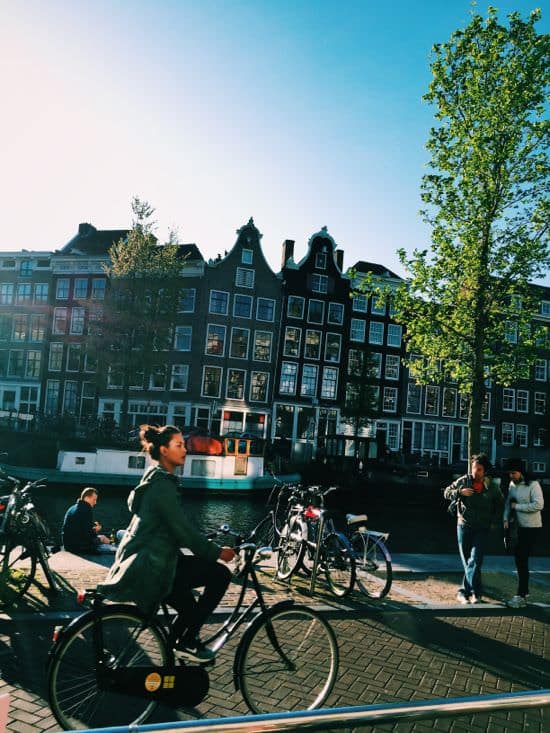
Earlier in the Summer, I took an impromptu trip to see ‘Late Rembrandt‘.
It was the first time that an exhibition had been solely dedicated to Rembrandt’s late works. Many of the most famous paintings that he produced in the last 15 years of his life had been brought together from museums and private collections across the globe.
This period is often the most celebrated due to Rembrandt’s development of a more gestural, impressionistic style and this was some 200 years before the popularity of the Impressionists.
He was out there!
I’d missed the exhibition when it was on show in London at the National Gallery but for the final leg of the tour it was going home to the Rijksmuseum in Amsterdam.
Heavy dark shadows, hidden brooding eyes, thick scratchy textured marks, lots of Brown umbers and a dirty yellow varnish glow are all the things that excite me about Rembrandt’s self-portrait style.
With the allure of Nutella Waffles, the opportunity to visit Rembrandt’s Studio and the once in a lifetime chance of seeing so many Rembrandt’s up close together, how could I resist…
Rembrandt’s early years
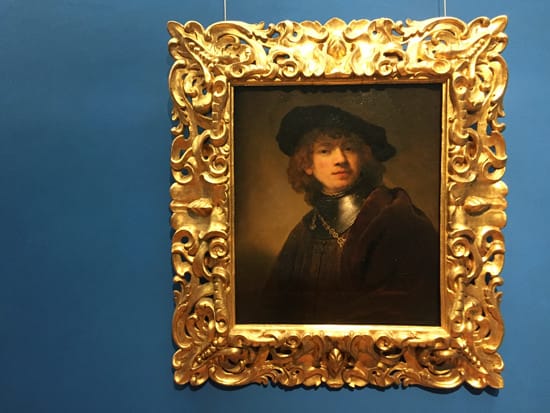
Rembrandt Harmenszoon van Rijn was born on 15 July 1606 in Leiden, Holland.
His parents were both Millers and despite having a large family, took their children’s education seriously with Rembrandt attending Latin school followed by University at Leiden.
He didn’t stay at the University long and switched subjects to focus on his passion for art.
His apprenticeship started under the tutelage of Jacob van Swanenburgh, although Swanenburgh’s studio was based in Leiden, he had previously travelled extensively throughout Italy for many years absorbing the painting style of the Italian Renaissance. He incorporated these techniques into his teaching methods which then influenced Rembrandt’s own style.
Rembrandt studied with Swanenburgh for three years before heading to Amsterdam to study under one of the most famous painters of the day Pieter Lastman.
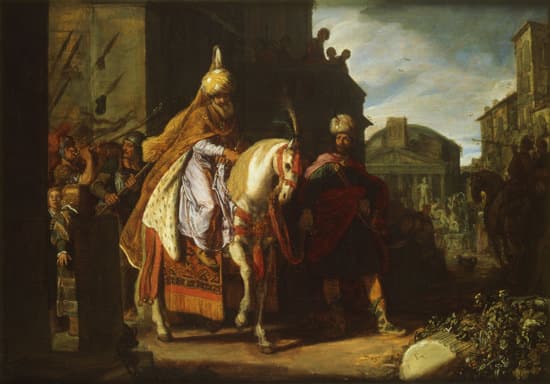
The Triumph of Mordecai, Pieter Lastman, 1617
Lastman was particularly taken by the strong light and dark effects created in the paintings of Caravaggio, known as Chiaroscuro – (Pronounced: key-ARE-oh-SCURE-oh)
These dramatic plays of extreme darks with just odd glints of bright highlights would influence Rembrandt’s portrait style throughout his entire life but interestingly Rembrandt never actually travelled to Italy. He was an exceptionally fast learner and after six months, having mastered everything he had been taught, returned to Leiden to set up his own studio and take on his own students.
Lastman was well respected and attracted other talented pupils to apprentice with him, another of Lastman’s students alongside Rembrandt was the painter Jan Lievens.
Jan Lievens was somewhat of a child prodigy who had a natural aptitude for drawing and painting. He started his apprenticeship aged just 8 and would later become a close friend of Rembrandt’s.
The techniques of Rembrandt vs Lievens
To give us a glimpse into his character and the type of painting techniques Rembrandt was using early on, it’s interesting first to look at a portrait of Rembrandt painted by Jan Lievens. Here we have two painters, learning the same approaches and techniques but with their own different interpretations.
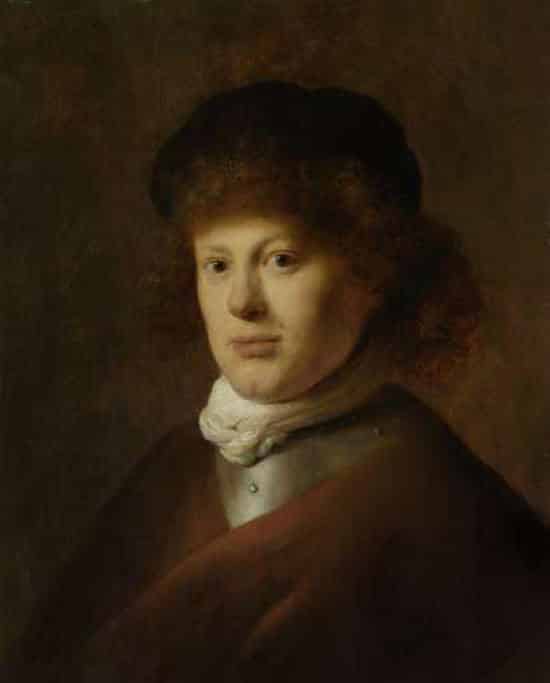
Portrait of Rembrandt Harmenszoon van Rijn, Jan Lievens, Oil on panel, 57 x 44 cm, 1628.
You can see that the painting by Jan Lievens of Rembrandt is very much in the style favoured of this period. The face is well illuminated from one single light source, the background is in dark shadow and the palette is very muted. It also flatters Rembrandt, both in the soft light source and his features.
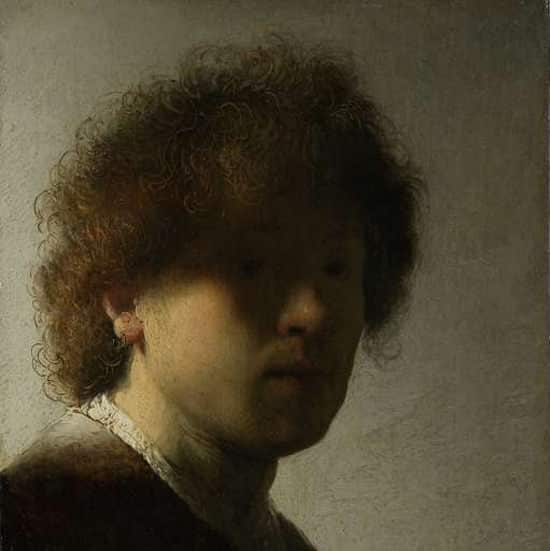
Here is a Rembrandt self-portrait from the same year
Self Portrait, Rembrandt Harmenszoon van Rijn, 1628
Rembrandt has taken the lights and darks to the extreme, instead of brightly illuminating the eyes he plunges them into darkness, so us the viewer, have to peer closer to see who is staring straight back at us.
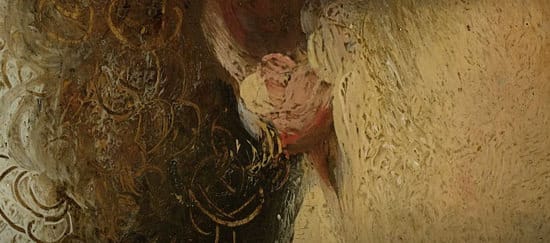
You can also start to see the differences in paint handling when you get up closer to the paintings.
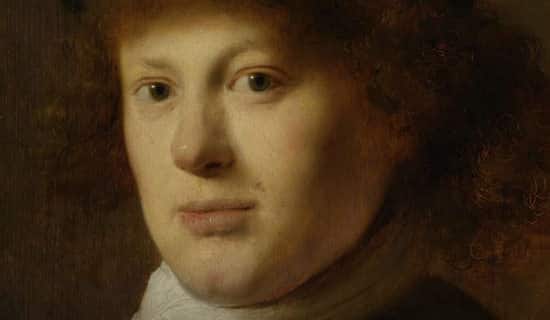
In Lievens painting, you can see a thin smokey application of the general tone of muted brown. It appears on the shadow side of the face, the top of the hair and on the edges of the armour. This would have been the initial colour painted over the entire canvas. (Rembrandt often used a slightly duller grey). He’s then subtlety built up the colours into the face leaving the shadow side thin and the lights more impasto.
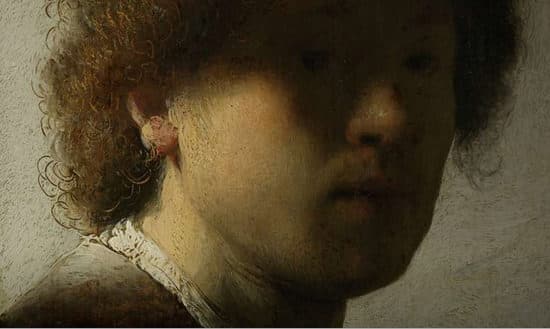
Here Rembrandt is using the same technique of adding details with the brush, but the paint application is much thicker. This difference in thickness enables more valleys of paint to be created, and this comes in handy when glazing over with darker pigments, but note how the colour palette is very similar for both artists.
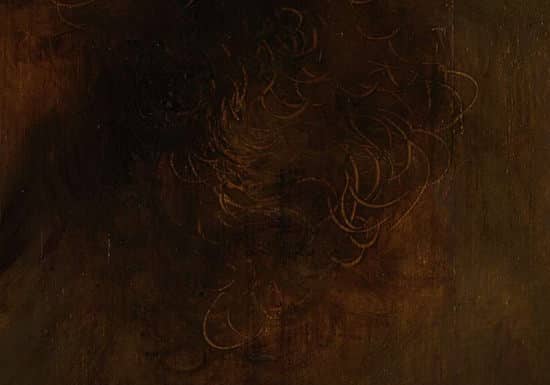
Detail, Portrait of Rembrandt Harmenszoon van Rijn, Jan Lievens.
Lievens has used the pointed end of his wooden paint brush to scratch the shapes and curls of the hair into the wet paint surface.
Self Portrait (detail), Rembrandt Harmenszoon van Rijn, 1628
Rembrandt has used the same technique – just bolder.
Notice how the dark glaze has pooled into the crevices created by pulling the brush handle through the paint.
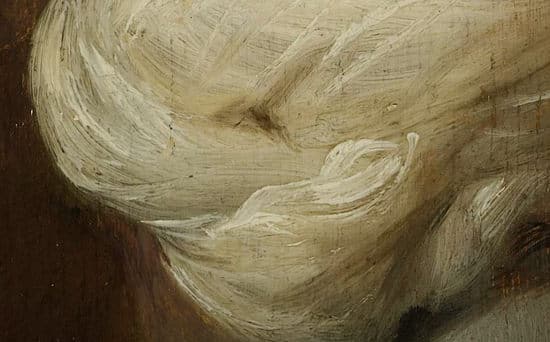
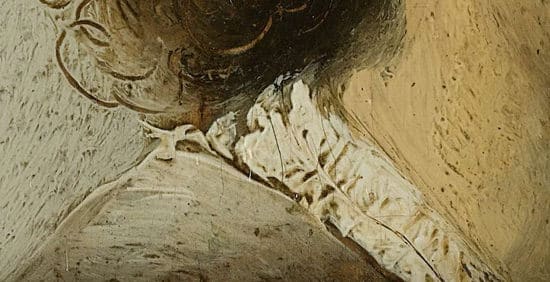
Detail, Portrait of Rembrandt Harmenszoon van Rijn, Jan Lievens.
Lievens has used the same technique of overglazing with a brown glaze over the white, but because the initial white impasto isn’t as thick, it gives a more subtle effect to the drapery.
Amsterdam light & Rembrandt’s house
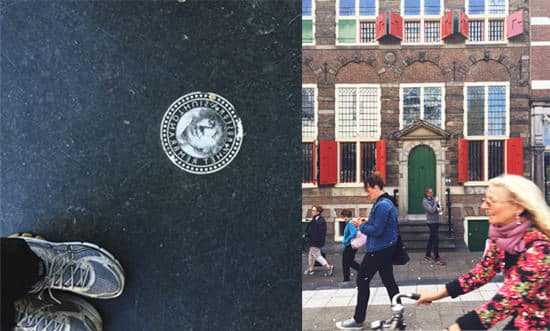
In 1631, the two young painters parted ways having shared a studio space in Leiden. Lievens to England and Rembrandt, aged 25, moved back to Amsterdam to set up his own portrait studio.
Initially, he stayed with art dealer Hendrick van Uylenburgh, his business was growing in success and wealthy patrons were eagerly commissioning his portraits alongside much larger scale mythological and religious works such as this painting below known as The Night Watch.
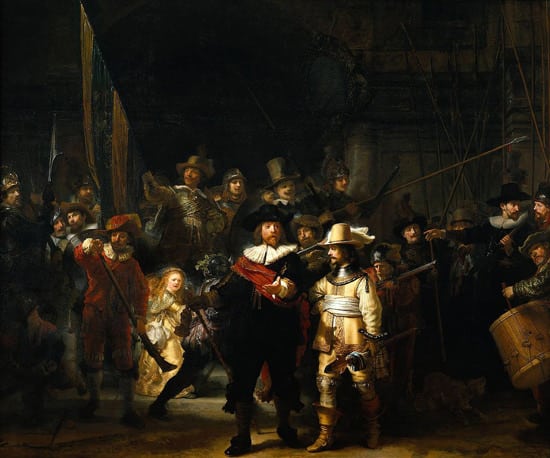
The Night Watch, Rembrandt van Rijn, Oil on Canvas 1642 (363 cm × 437 cm)
He was much in demand and in 1639 (now happily married to Saskia van Uylenburgh Hendrick’s cousin) he moved to a prominent, grand newly built house in the upcoming ‘Breestraat’ district.
Rembrandt thought this house would be perfect, it combined an elegant gallery selling space, a teaching space for students, a studio space for him to paint in and a home for his family.
Almost 400 years later and the building has undergone massive restoration, now acting as the Rembrandt House Museum
The interiors have been carefully restored using historical knowledge, the best-educated guess as to how Rembrandt used the spaces is interesting but the one thing I had come to specifically see, the one thing that couldn’t have been altered, is the way the light falls into the studio space.
Having researched Rembrandt’s lighting for my own studio build – Art Studio Lighting Design (how to avoid being kept in the dark) it was extremely interesting to see how the natural light behaved compared to a photograph of it.
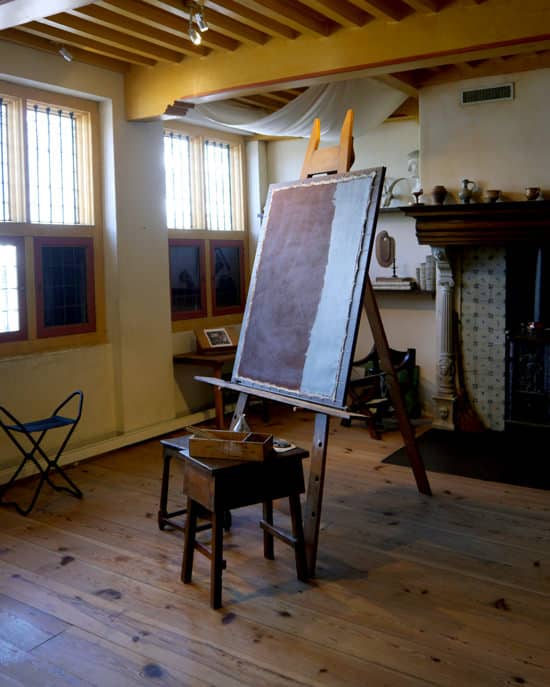
Rembrandt’s Studio
It was a lot softer and more flattering than I initially thought it would be. Most of the windows were without shutters the day I visited, creating a long rectangular soft light that wrapped around the face.
It’s hard to know how many of the windows Rembrandt would have kept dark whilst he painted, I imagine he would have controlled the light depending on the feel and mood of the portrait he was after.
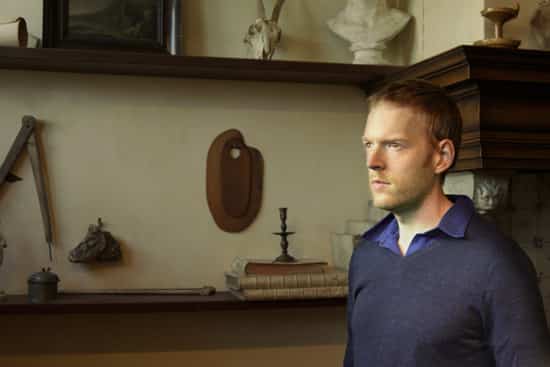
Diffused Light in the studio
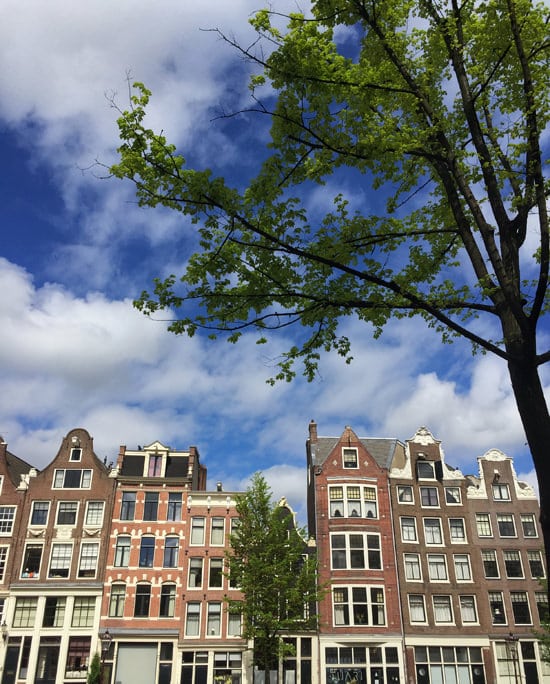
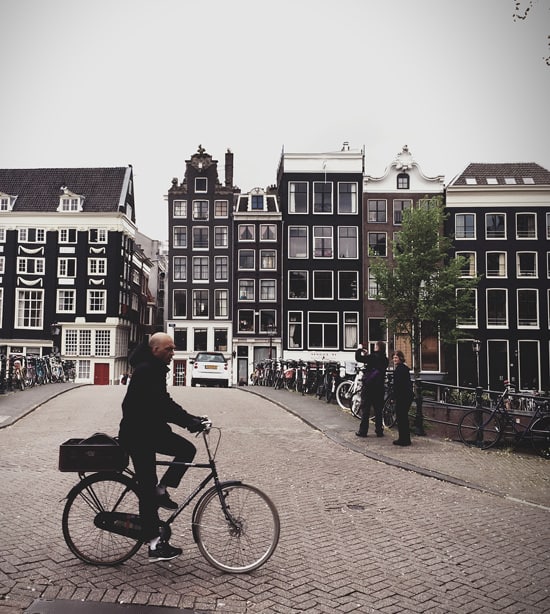
Interestingly from the minute I had arrived in Amsterdam, I noticed the play of light everywhere we went. The architecture and network of streets allow shafts of light to fall in small pools and shapes. There were snapshot views around every corner that seemed to look like a Rembrandt or a Vermeer painting!
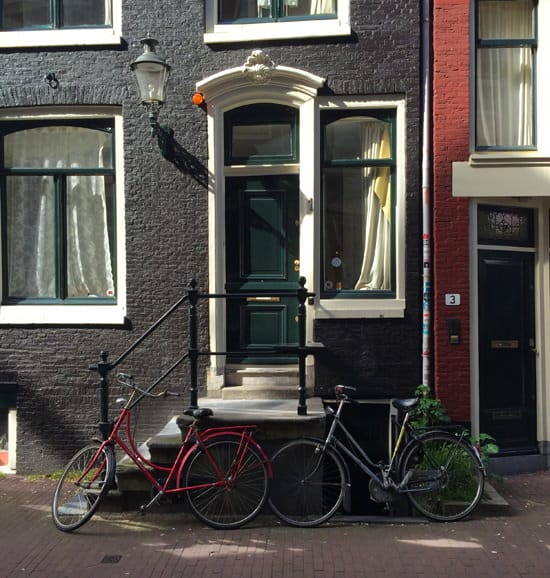
In this photo, the natural light seems to defy light logic. If you look at the light hitting the top of the step you’d assume that same light would then hit the railing but this is actually in shadow.
Then half of the bikes are in light and half in shadow and you have these very angular almost cut out shapes of light hitting the pavement. The narrow canal streets with tall irregular buildings mixed with a strong clean light are beautiful.
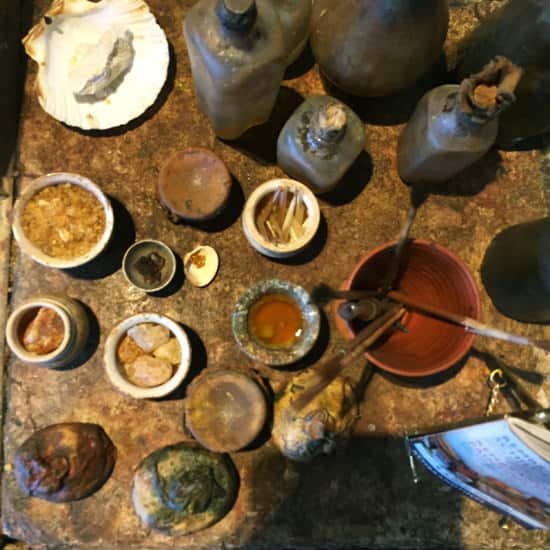
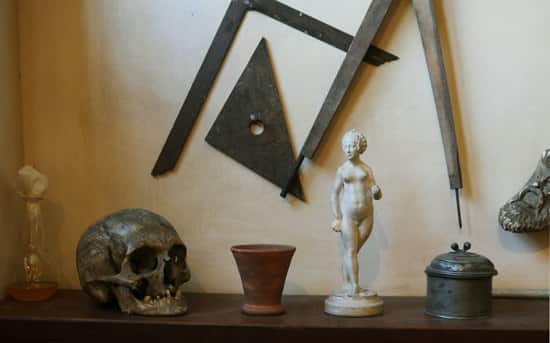
There are curiosities and props that are similar to the ones listed in the inventories of the house, Rembrandt would have collected as the reference for his paintings and as a Museum, it’s a fascinating glimpse into how people lived in this era.
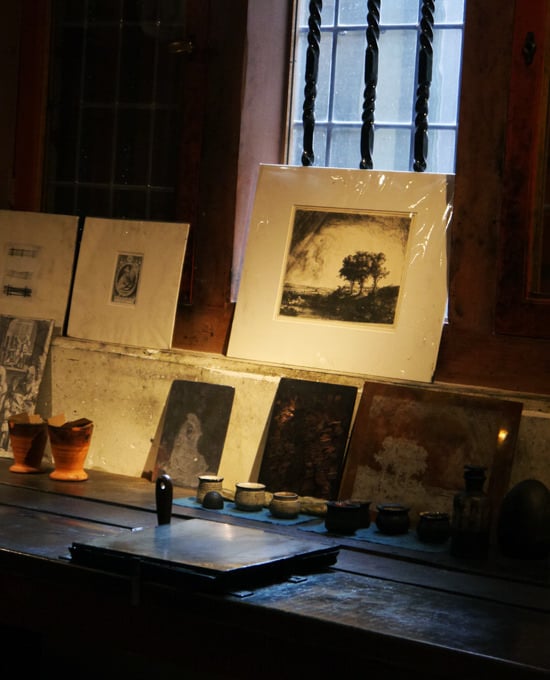
Rembrandt had initially bought the house for thirteen thousand guilders, a huge sum, which he could not come up with in its entirety. He was, however, allowed to pay it off in instalments and although he was earning a lot of money with his commissions, it appears his spending was always one step ahead of his income eventually leading to Bankruptcy in 1656.
Late Rembrandt
Rembrandt’s later years were burdened with debt, the loss of his wife and 3 of his children but his paintings continued. Throwing himself into his work Rembrandt produced some of his most personal, deeply moving and contemporary works often referred to as the finest works of Rembrandt’s career.
From the 1650s until his death in 1669, Rembrandt pursued an artistic style that was expressive and radical. His bold manipulation of printing and painting techniques and progressive interpretations of traditional subjects inspired generations of artists, earning him a reputation as the greatest master of the Dutch Golden Age.
‘The Late Works’ examines the themes that preoccupied Rembrandt as he grew older: self-scrutiny, experimentation, light, observation of everyday life and even other artists’ works; as well as expressions of intimacy, contemplation, conflict and reconciliation.
National Gallery, London
For the majority of the show I spent my time with my face as close to the paintings as possible, this wasn’t just due to the huge number of people visiting the exhibition, but for me, I always really want to see the paint handling up close.
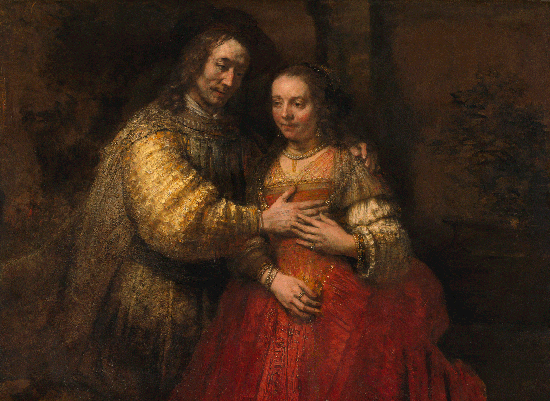
The Jewish Bride, Rembrandt van Rijn, Oil on Canvas, 1658
If you want to achieve a Rembrandt effect with your impasto, you need to go thick.
Rembrandt’s painting of The Jewish Bride is a great choice for getting up close to see how he actually applied the paint to the canvas, and then how he manipulated the optical effect by combining thick impasto paint with thinner translucent glazes.
He would have used a fast drying white such as Lead white to build up the thick paint.
There are some reports of traces of flour in his paint mixes.
It is said, flour could have been mixed in with the paint to speed up the drying – my guess would be these paintings would have just been left over at mum and dads for the weekend and attracted flour to the surface from the atmosphere of the flour mill.
He most likely added Calcium carbonate to the white, which is essentially chalk (it can also be called Whiting). It is used to speed up the drying time and creates a more opaque paint as oil paintings become more translucent with age.
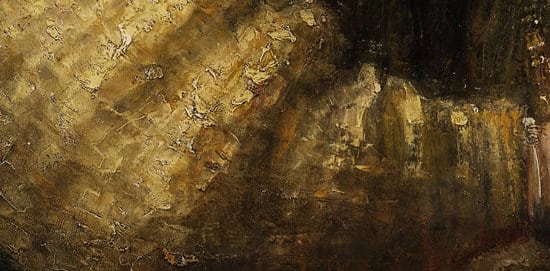
When you look at the golden sleeve you can see the same technique that was apparent in his early work, just more pronounced. The thick paint is applied with a palette knife and when the glazes are then applied, they sink into these grooves.
It’s a very simple yet effective technique and it’s very easy to replicate using acrylics due to the fast drying time of the paints.
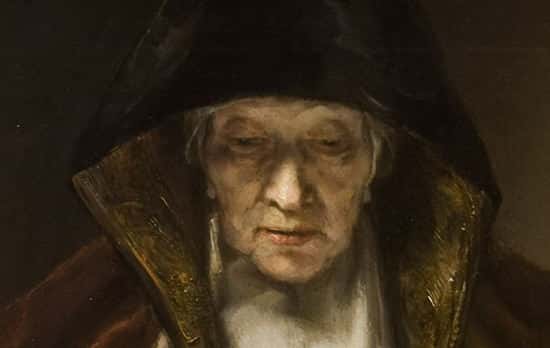
Old Woman Reading, Rembrandt van Rijn, Oil on Canvas, 1655
In this beautiful painting of an Old Woman Reading what is interesting again is how dark he has painted the eyes. When you squint your eyes at the piece, notice how just the triangle of the nose comes out at us. The rest is really, really subdued, with just the subtle indication of the light-fall.
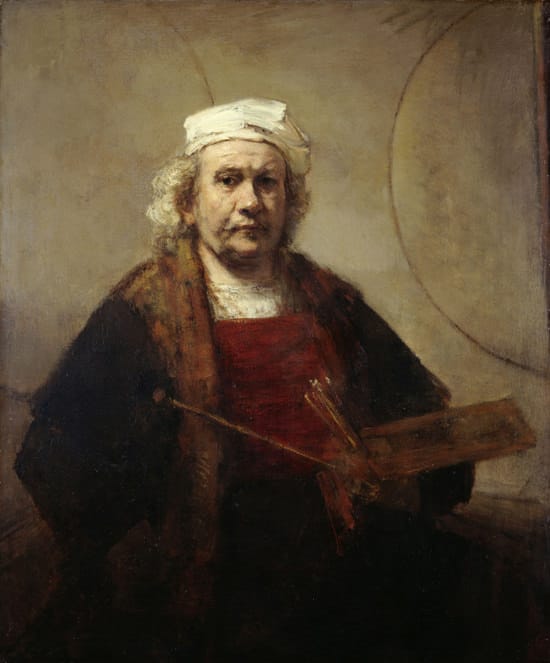
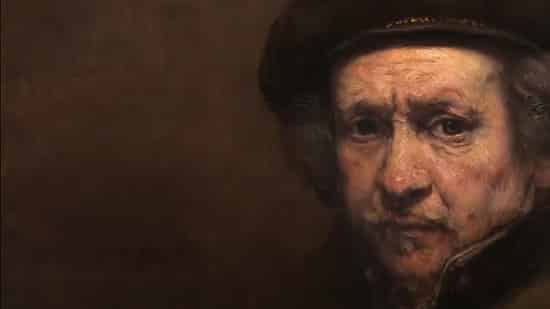
Self-Portrait, Rembrandt van Rijn, Oil on Canvas, 1659-1660
This self-portrait was my favourite piece in the show, I love the composition, the colour tones used and the paint handling on the face.
His self-portraits have a more contemporary feel to them, they feel like he painted them for the sheer pleasure of creating. He didn’t have to please a sitter or conform to the styles of the age.
Rembrandt created nearly one hundred self-portraits during his lifetime and they act as a visual timeline of his techniques and influences. When I’m painting a self-portrait, it’s often when experimenting with a new method and I’m super excited to get going, so that’s why it’s so fascinating to see other artists self-portraits.
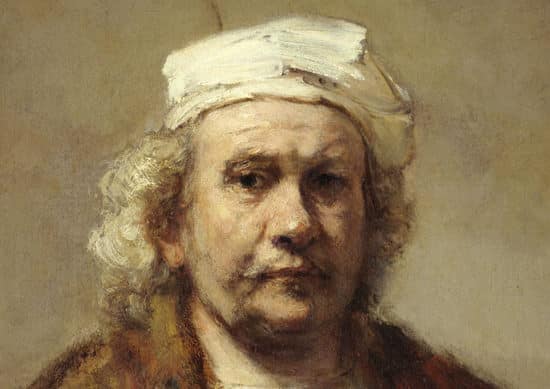
When we take a closer look you can start to see the grey tones on the edges of the face around the eyes and around the chin.
You can see how these greys are very close to the background grey tone.
This helps to balance the face within the whole painting and send these areas of the head structure further back into the background of the piece. When you have the warmer flesh tones on top, they come forward and give a more realistic sense of the face.
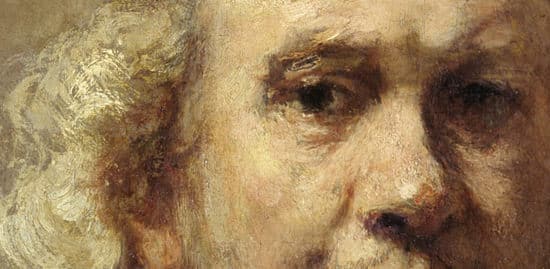
It’s super sketchy up close and I absolutely love how he’s handled the hair.
From a distance it really looks like a head of individual hairs, up close, is just scrappy grey undertone with an impasto gestural brush-stroke over the top.
Using a stiffer bristle brush to move the paint around in your work, can create an optical mix where the criss-cross brush stokes drag the paint together and leave the texture showing, rather than smoothing the transition together.
He most likely created a Grisaille under-painting for this portrait, after first establishing the big form shapes with simple dark tones, then building up the piece with thicker and more saturated colours.
Over time, the yellow in the Dammar Varnish has discoloured the painting, so it has more of a yellow glow, meaning the grey/green tones in the cool areas of the paintings would have initially been less green and bluer. I personally love the effect of the ‘yellowing’ as it brings and softens all the colours together, especially in a Rembrandt when you have a base colour of reds and Burnt umbers.
Many beginners paint too thinly and put out too little paint.
With acrylics, this can be particularly crucial.
Acrylics dry by evaporation, the larger the blob of paint, the slower the drying time. Working with thicker passages of colour can be particularly effective if you want to achieve similar ‘Rembrandtesque’ effects.
Amsterdam was beautiful, Late Rembrandt was fascinating and you’ll be pleased to hear even the chocolate waffles lived up to their promise.
One other unique discovery was a perfect sphere of cloud-like vanilla ice cream, wrapped in a warm dome of freshly whipped cream. It cost 1 euro and I treated myself to 2 in the space of half an hour, all in all a very pleasing trip.
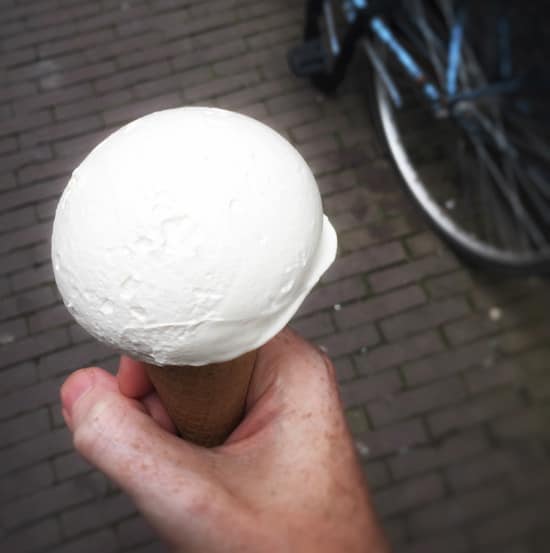
Banketbakkerij Van Der Linde – Best Ice Cream / Cream cloud combo ever
You Might Also Like:
1. Singer Sargent & Friends – Review of John Singer Sargent exhibition and techniques.
2. Inside Sorolla’s Studio – Art studio tour of Spanish painter Sorolla

