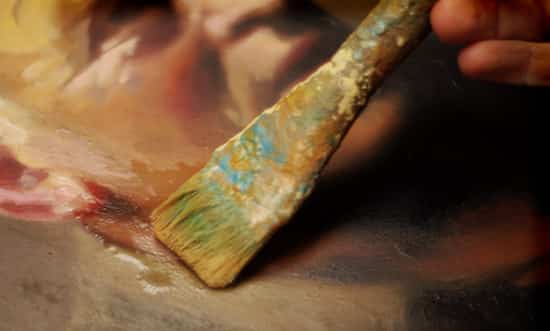
3 Reasons why artists varnish their work
We’ve all done it.
Spent hours, days, even weeks slaving away on a painting, but when we finally apply a varnish…it all goes horribly wrong.
The anxiousness builds.
You’re now sure there are mismatched sheens on the surface, and it was perfect before you started varnishing!
Or maybe you thought it was a good idea to wrap your newly varnished painting with bubble wrap just before the deadline of an exhibition, only to find out at the private view the bubble wrap had left hundreds of tiny circle imprints on the surface of the painting….mmm..surely no one would ever do that!
The anxiety and disappointment that comes with varnishing can sometimes seem too much.
With all the confusion, conflicting advice and frustration in creating the perfect varnish finish, you can’t help wondering, what’s the point of varnishing at all?…
Traditionally varnishes were applied to keep paintings protected from all the dust, dirt, smoke etc.. in the atmosphere. The varnish provides a non-porous, protective layer that is removable for conservation purposes; it serves its aesthetic purpose whilst also providing protection.
Any dirt attached to the painting will be on the varnish layer and not embedded in the paint layer.
So when a painting has yellowed and looks suitably dirty, the varnish can be removed (and all the dirt with it), restoring the painting to its vibrant, former glory, then a new varnish can be applied to protect it for the next 100 years or so.

Portrait of a lady with a dog 1590s, Lavinia Fontana 1552-1614 (Rebecca Gregg Conservation midpoint through a varnish removal)
As I mention below, there are other aesthetic reasons to varnish. Still, it’s worth remembering that although it’s often called a ‘Final picture varnish’, traditionally, varnishes are meant to have the capacity to be removed without damaging the painting.
It’s worth noting there are many Acrylic permanent ‘non-removable varnishes on the market. They will give you a nice even finish to your work – without going through the process below.
Personally, I always work with a removable varnish to ensure the future preservation of the aesthetics of my paintings.
Is removable varnishing appropriate for you?
I always think of portraits and paintings handed down to generations in the future it is definitely worth varnishing with an old school technique. However, it’s a personal call as I appreciate some of our paintings end up on the neighbour’s wall. It might be in this scenario an acrylic permanent ‘non-removable varnish fits the job.
Whatever you decide is best for you and your paintings, it’s always worth knowing good professional practice.
So we shall carry on as if all of your paintings will someday hang in the Musée du Louvre!
The 3 main reasons why artists varnish their work:
1. Deepen (saturate) the colours:
Although we will be looking at acrylic varnishing techniques, the anxiety over how to varnish or what to varnish with stems back to Fresco paintings.
In his book The Craftsman’s Handbook, Cennino Cennini (about 1370–about 1440) tried to create a matte varnish to his paintings; he created a recipe for varnish from whipped eggwhites. The only issue was it went grey over time.
Then with the Renaissance, a more high gloss varnish finish was favoured, giving the paintings the “Old Master Glow” and helping to give a permanent enrichment to the colours.
Acrylic paintings can often look dull when they’re dry, and some manufacturers such as Old Holland and Winsor & Newton have started to add a glossy acrylic binder to give the paints a more satin appearance.
Even though that helps to get the most saturated colour from your acrylic painting, a glossy varnish will always enhance your colours more than just using paint alone.
2. Create an even gloss/satin/matte sheen over the entire picture surface.
Some acrylic pigments dry shinier than others.
Different mediums and gels also have different finishes, and on top of that, acrylic paint changes in sheen depending on how much water is added to the paint.
This result is a finished painting with areas of different sheens.
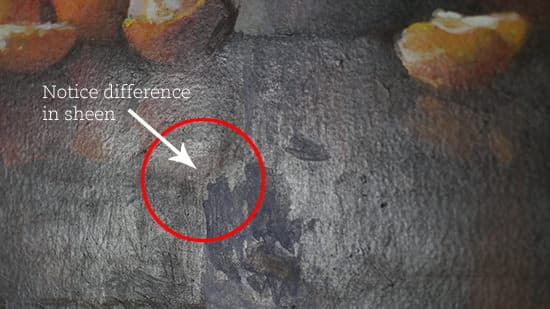
You can see in this painting there are uneven levels of sheen due to parts where I’ve mixed a gloss glazing liquid into my paint and then worked water-thinned paint over the top.
So can I paint a varnish directly onto my acrylic painting to unify the appearance?
Well, yes and no.
If you want your acrylic painting in the future to be easily cleaned/restored to the same finish as when you paint it, i.e. remove and replace the varnish – then you need to apply an isolation coat first.
A Note for Oil painters
The process is slightly different if you were varnishing your oil painting (or deciding to use a non-removable acrylic varnish ). You can usually paint your varnish straight onto the paint layer without the need for an isolation coat.
An Isolation Coat
This does all the heavy lifting for you.
By painting an isolation coat, it provides an even sheen and a glass-like surface, so when you apply the final varnish, it will just glide on. It’s a bit like laying a thin glass sheet over the paint surface and then applying a varnish to the glass.
So rather than the varnish soaking into sections of absorbent canvas, it ‘sits on top of the isolation coat.
N.B. An isolation coat has to be done with a gloss medium. When it’s dry, you can then apply varnish of either Matte, Satin or Gloss depending on your taste which will always supersede the glossy isolation coat finish.
How do you mix an isolation coat?
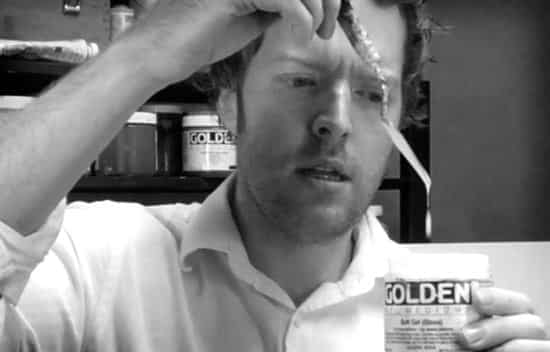
Mix the isolation coat to the consistency of single cream
I use products from Golden Acrylics. Liquitex, Winsor & Newton and Atelier Interactive all have slightly different medium choices, but the same principles apply.
Golden Soft Gel Gloss – it must be the gloss version; the satin and matte version of soft gel is not recommended due to the matting agent in the medium. The gloss will dry the clearest of the gels. Even if you want to finish with a Matte surface, apply the gloss isolation coat.
- 2 parts Soft Gel Gloss
- 1 part water
Then in the future, if you ever need to replace the varnish, you can apply a varnish remover, and it will go back to the isolation coat and never hit the acrylic paint surface.
Common questions about how I apply an isolation coat:
Q. Why do you use a brush?
A. Most of my paintings are quite thin in an application; there aren’t any thick impasto areas, so the brush glides over very easily, and I can work quicker.
Q. Why don’t you spray your isolation coat?
A. If you are working on a very large-scale painting and wanted a super, super even finish, then spray application will always give you the evenest sheen finish; however, it is more costly. It would help if you had a very well ventilated area. Ideally outside.
You would also need to use a different medium than the Soft Gel Gloss.
For a spray application of an isolation coat
For a spray application, Soft Gel Gloss will be too viscous to go cleanly through the airbrush; if you want to spray, use a mix of:
2 parts – Golden GAC-500
1 part – Transparent Airbrush Extender
Apply multiple thin layers depending on the absorbency of the surface you’re spraying. It’s quite a lot of extra effort.
Q. Do you ever use a sponge to apply an isolation coat?
A. No, a sponge tends to cause froth and bubbles in the isolation coat but can be used when applying certain water-based varnishes.
Q.What is the biggest isolation coat application problem?
A. Working too slow.
Going over a nearly dry section of the isolation coat with your brush.
Trying to cover a large area in one go.
Applying the isolation coat with bubbles in the mix.
Trying to finish with one thick coat, whereas two thin coats would be better.
Deciding on the level of the sheen of your varnish
It’s a personal preference.
Many of the Impressionists preferred not to varnish at all. They didn’t like the visual effect or the ostentatious feel of a highly glossed surface.
“The Matte surfaces favoured by impressionists and fauves within a primitivizing impulse – in their case a return to the look of fifteenth-century tempera and fresco painting”
Seeing Through Paintings: Physical Examination in Art Historical Studies by Andrea Kirsh, Rustin S. Levenson
Pissaro and Monet preferred the unvarnished look, and many Impressionists would aim to work on a more absorbent gesso ground.
The gesso ground would soak up the oil from the paint and leave a matte appearance on the surface.
In an ideal world, I would have a matte finish to my paintings too. Still, with all the colour intensity, a gloss varnish delivers….but I said ‘in an ideal world’ because, with varnish, it’s always a compromise between aesthetic ideals and chemical limitations.
The Matting agent used to create Matte varnish is usually white.
On light-coloured paintings, it isn’t noticeable, but on dark paintings, it can give the surface a cloudy or frosty look; therefore, the colours don’t necessarily shine through it and blacks, in particular, will always lighten in appearance with a matte varnish.
A Matte surface
As mentioned above, a matte varnish contains a matting agent, usually white, so even though it dries clear, it’s still not 100% transparent.
As a comparison, gloss varnishes dry almost 100% transparent and satin somewhere between the two.
Modern painter Robert Motherwell had to accept the aesthetic implications of the varnish. It led him to varnish different areas of the painting in different sheens.
“the whole conception of this painting was extremely matte….The difficulty with varnishes is that they are shiny, glossy, so there is a problem: for example, if one made a drawing on white rag paper, and if one varnishes it, it immediately becomes shiny, like the illustrations in popular women’s magazines on glossy paper…But my greatest anxiety was to get a varnish that was not shiny.”
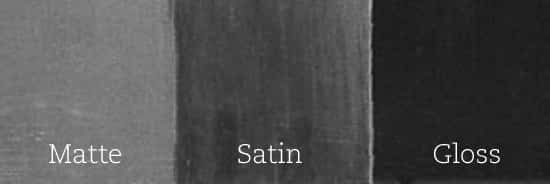
Different varnish finishes on black paint
This matte finish that can often appear in acrylics is the same as areas of an oil painting that have ‘sunk in’.
This is often why dark, dramatic paintings have a final glossy picture varnish applied. It brings back the colours and makes the blacks look really black.
If you try to apply a satin or matte varnish to a black painting, the blackness level will be lifted.
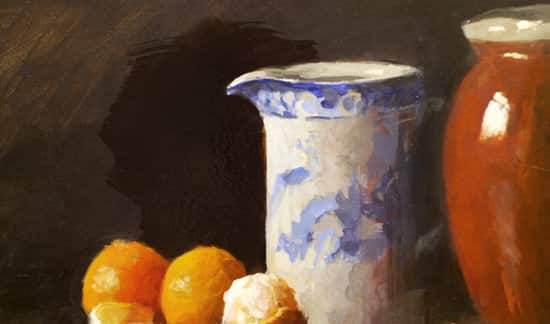
Notice the difference in intensity of the black above, depending on the varnish.
So what approach do I take?
I apply an isolation coat, which will always be gloss.
Then leave it to dry for 24 hours so I can assess the level of sheen that best suits the painting colours and the environment in the painting will hang (if it’s a specific commission). It’s worth considering bright lights within the hanging space, as these can often cause a glare on a too-glossy finish.
Most of the time, I would then mix a bespoke solvent-based varnish by adding matte varnish to a gloss varnish. So, in essence, creating a controllable satin finish.
I apply thin coats, sometimes 3 or 4, always assessing whether I’m happy with the level of sheen/colour saturation compromise when it’s dry.
3. Protect the painted surface from atmospheric effects to make the surface easier to clean.
Acrylic paint, by its very nature, is quite a soft material. If you have a blob of acrylic paint that is dry, you can still push it and squeeze it, and it will move.
There are 2 main choices for your acrylic painting—either a water-based varnish or a solvent-based varnish.
Water-based varnish (Polymer)
Water-based varnishes usually are created from an acrylic polymer, similar in consistency to an acrylic glazing liquid.
They provide a good level of protection and small to medium pieces are an easy, great choice, especially if you work from a small studio within your home.
They are convenient, cleanup friendly and don’t smell strong; however, they are harder to apply evenly on larger areas with a brush as they dry too quickly for big canvases.
They are also milky white when applied, drying to clear with a tendency to foam when mixed (so often need to be left to settle before applying)
They don’t give as hard a surface finish as a solvent-based varnish.
Some polymer varnishes need to be thinned before use (Golden Polymer Varnishes need to be thinned) as they are manufactured to be thicker in the pot so there is greater consistency to the varnish film when it is thinned and applied.
Thinning with water (ideally distilled water):
- 3 Parts Varnish
- 1 Part (distilled) Water.
Pro tip: If you’re having problems working quickly enough with water-based varnishes, then you can use a large sponge to apply.
This only works if you’re using a water-based varnish that is already quite fluid. You need to work quickly and be patient to build up the varnish in thin layers. Be careful using a sponge with an isolation coat as it can lead to foaming.
Pros
Clean up with water
Dry quickly
No strong smell
No need for mineral spirits for cleaning
Cons
Tricky to apply
Dry very quickly
Not as hard varnish finish
Milky when wet
Solvent-based varnish (MSA)
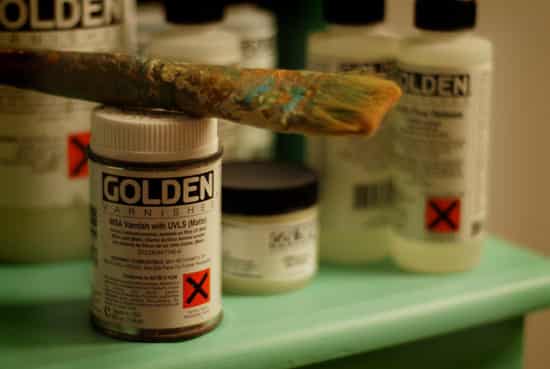
Solvent-based varnishes or Mineral Spirit Acrylic varnish dry to a tough yet flexible layer.
MSA varnishes are clear when wet and also provide an easier application with self-levelling qualities. The clarity and appearance of the finish are slightly superior compared to a water-based varnish.
The biggest drawback with MSA Varnishes is that they must be thinned before use, with full-strength spirits. They are strong-smelling, and clean-up is messy so that home use can be impractical.
Here is a demo video from Golden paint showing how to correctly thin Mineral Spirit Varnish:
Easier to apply
Self-levelling qualities give an even sheen
Slow drying so are excellent for big pieces
Hard varnish finish
Cons
Have to thin with full-strength spirits before using (not odourless mineral spirits)
Clean up using solvents
Strong smell
Not as cleanup friendly in a home (a bit messy)
If your varnished painting looks a little uneven or the finish isn’t absolutely perfect, don’t be too hard on yourself – spare a little thought for Renoir.

Within the French Academy, before the official opening of the Salon exhibition, artists were allowed a varnishing day. The artist’s colourmen often carried this out.
Cezanne’s art dealer Vollard quotes Renoir from 1879:
“The day before the opening, a friend came and told me that he had just been to the Salon, and that something queer seemed to have happened to my Mademoiselle Samary. I dashed to the Salon and found the picture almost beyond recognition – it looked as if it were melting away. It seems that the framer instructed the delivery boy to varnish another picture that he was delivering at the same time. The boy had a little varnish left over and decided to give me the benefit of it.
I didn’t varnish mine because it was still wet, but he thought I was being economical! The result was I had to paint the whole thing in an afternoon.”
So my bubble wrap bubble marks over my piece don’t seem so disastrous after all!
I hope this helps when deciding to varnish your own works.
