…and How to Paint Quicker
When you first start painting, the vision is to squeeze out bright, vivid paint colours, a handful of paintbrushes, or maybe a beret?
But often, this approach is an illusion, an artist myth.
To get professional results, you need a professional approach.
If you want freedom and expression on the canvas, a bit of premixing can help you achieve more pleasing results, especially if you try to achieve a more realistic effect.
If you spend a little extra time preparing, your actual time at the easel will be more efficient, quicker and rewarding.
Let’s enter the world of colour strings…
What are the colour strings?
When painting, you can either mix your colours as you need them using the raw pigment colour straight from the tube or premix your most useful tones.
Some artists prepare batches of colours in advance, others only prepare a few, and others don’t premix at all, preferring to mix on the fly – and this is the approach that beginners usually favour.
It really is a personal preference, but premixing is definitely worth practising.
When trying to create subtleties in portraits, it can be practically essential.
Traditionally, colour strings are used with oil paint because you have the luxury of slow-drying paint, so you can premix all your colours and tones one day, and the paints will stay wet for weeks (depending on the size of the blobs of paint and pigments used)
However, you can also use the same approach with acrylics.
You have to work a bit quicker, but I often premix colours I regularly use and either:
1. Keep them in small resealable plastic tubs or empty paint tubes.
2. Premix paints with a palette knife on a tear-off palette, then transfer these piles of paint to a stay wet palette. This acts as the loading bay, and you can keep them on here for about a week.
Then use a fresh tear-off palette to layout the colours you need for each part of your painting. Although the second method sounds a bit laborious, it can become quite therapeutic and mean the actual painting time will be quicker and easier.
Pro tip: make sure the stay-wet palette isn’t too wet, or the paints aren’t all student grade paints. They will be too thin, so they will soak up the water and mix into each other on the stay-wet palette.
How to mix a colour string?
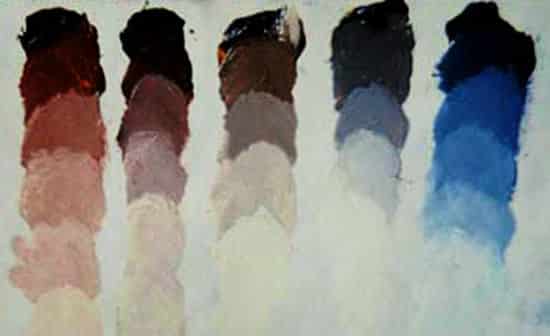
A colour string is a group of premixed piles of paints with different tonal values.
You usually start with the darkest colour in the string (say a pure ultramarine blue) and slowly add progressively lighter ‘steps’ to the mixture.
The lighter steps can be added with any lighter colour but are usually made by adding white as it is easiest to keep the tones as a clean tonal shift.
What does premixed colour mean?
Premixed: Sometimes you can buy a colour that has been ‘premixed’ by the manufacturer, say a ‘mid-tone grey’ or a ‘flesh tone pink’, but I favour staying away from these and using the basic 5 colour palette we’ve used before.
This will teach you both about each pigment’s tinting strength and show you how very subtle earth colours can be mixed from bright hues, using the principles of colour theory and complementary colours to help to dull and mute colours down.
 Split colours into zones
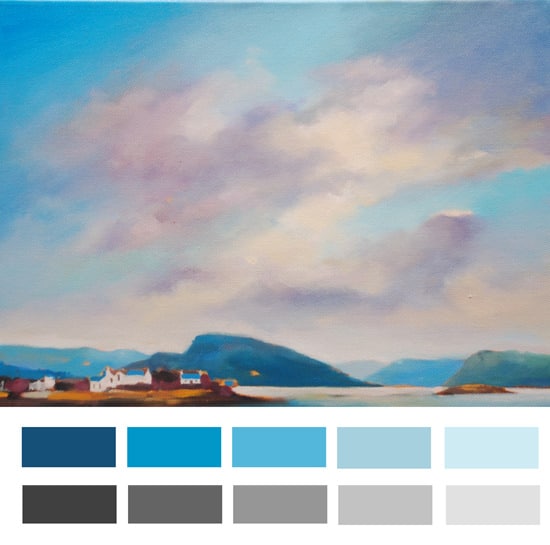
You can premix strings for certain areas of a painting; spend a few minutes looking at the subject and trying to split a painting into different zones.
So for example, in a simple landscape, the sky can be a string of three to five colours, say start with an Ultramarine Blue with a touch of white, make a pile, then add a touch more white to create the next tonal step, make a pile, then add a touch more white for the colour nearest the horizon line.
The mix above starts with a dark blue of Phthalo blue (green shade) with a touch of Ultramarine blue – then gets progressively lighter. This will help to create a soft, blended finish due to the ability to quickly intermix the mixtures with confidence, knowing that the mixes are already very close in tone to the finished scene.
Using colour strings in black & white paintings
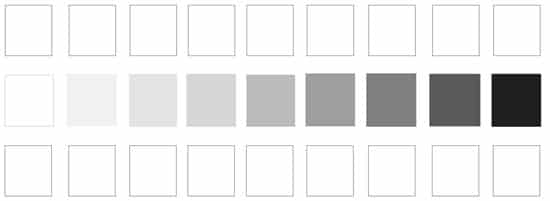
Even though they are usually called colour strings, essentially, the process stems from working with black and white tonal values. Often called a value scale or tonal range. For black and white paintings, a value scale of 9 or 10 mixtures is used. I prefer to use 9 mixes as it becomes easier to split lights, mid-tones and darks.
Each ‘step’ in the colour string has the same jump in tone when you flick your eyes between them.
You can download the above value scale and practice matching the tones with paint or pencil.
The power of 3
Using nine values can be useful when first modelling form because you can use the darkest 3 tones for the darks, the lightest three for the highlights and the middle 3 as the halftones.
The trick is having the willpower to only use those three premixed colours for that area of the painting! It will be very tempting to try and use other tones.
If you keep them separate, it will really improve the realism in your work.
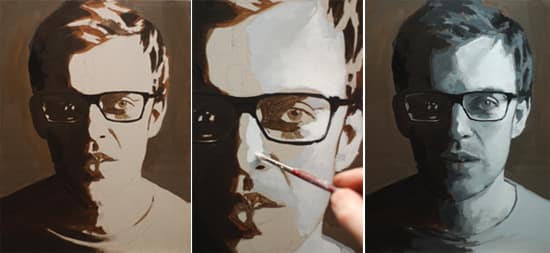
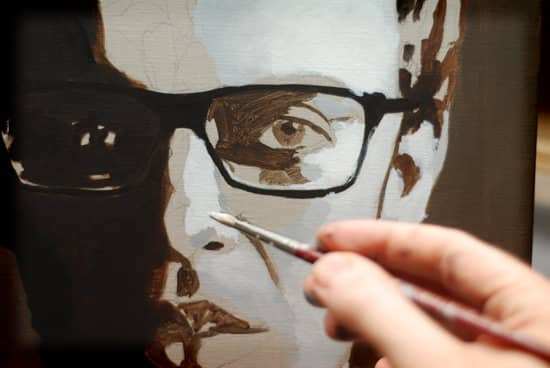
I worked on the basic 3 tone underpainting; it was on a raw umber and white ground, value 3 or 4.
The dark shadow tone is pure burnt umber; this lies in the darkest 3 tones. In this second stage, I use Raw umber and Ivory black for the neutral dark grey, and I also use flake white for the lights.
I then work up the painting using the full 9 tones I’ve premixed (painting 3 above). This stage in a painting can sometimes be called a grisaille – a monochrome tonal underpainting.
I have found it saves me a lot of time in the later stages of colour if I take the time to make a complete value painting in grisaille first.
The painting is still rough at this stage, but I am now ready to start modelling the form knowing my tones are in the right ballpark. Adjustments will be made, but this gives a great starting point.
Below is the palette I used. The darkest grey is a mix of Ivory black and Raw umber to create a neutral dark. I then added Flake white progressively.
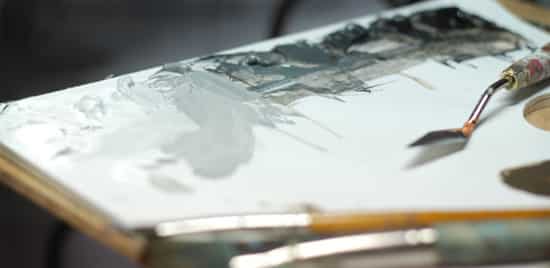
Using colour strings and experimenting with tonal shifts can give your paintings a variety in contrast while creating a harmonious painting.
The below video shows how to apply the colour strings to a blended sky using acrylics.
You might also like:
1. The Importance of Contrast
2. Are the 3 myths about Black Paint holding you back?


