

Thick or thin crust, delightfully flavorful and crispy, this homemade sourdough pizza crust is easy to make and loaded with your favorite toppings! Plus, you can freeze it for a make-ahead dinner on busy weeknights!

Pizza and sourdough… Two of our favorite things!
Whether cooked in an outdoor pizza oven or on the grill, pizza night is our favorite. My husband and 3-year-old like to call it a “gourmet feast”. 😉
This recipe requires very little hands-on time. It’s nourishing and simply delicious.
Pizza Crust Ingredients
- Sourdough starter – Your starter doesn’t have to be in its active, bubbly state for this recipe, but it should have been fed sometime within the last 12 hours. Don’t worry too much about how thick or thin it is, either. You’ll adapt the recipe by adjusting flour or water amounts to get a dough with the right consistency.
- Pure water — Choose filtered water free of contaminants. Warm water is best!
- Oil – I use olive oil in the recipe below, but you can use any liquid oil such as melted coconut oil or grass-fed butter!
- Flour of choice – I used whole grain spelt flour in the pizza pictured. Feel free to use your favorite whole grain or all-purpose flour such as wheat or einkorn.
Pizza Topping Options
- Pepperoni – Grated mozzarella cheese with tomato sauce and pepperoni.
- Meat-lover’s – All the meats you can think of — ground beef, sausage, pepperoni, bacon bits plus tomato sauce and mozzarella.
- Hawaiian – Sliced ham with mozzarella and pineapple chunks.
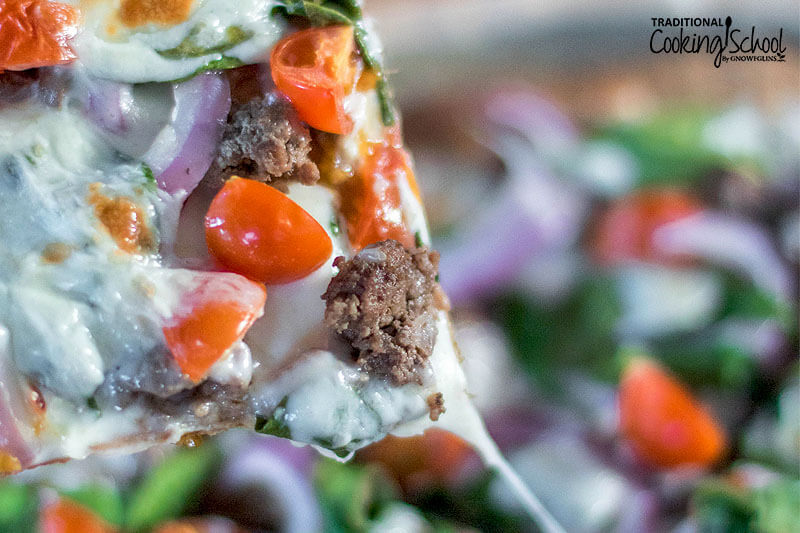
- Herbed Chicken – Shredded chicken sautéed in bacon drippings, grated mozzarella, bite-sized kale or spinach pieces, red onion, minced garlic, grape tomatoes, artichoke hearts, crumbled bacon, and a sprinkling of salt and pepper topped with fresh parsley when it comes out of the oven.
- Mediterranean – Dried thyme and oregano with mozzarella and feta cheese, topped with black pepper, red onion, grape tomatoes, black olives, bell pepper, and artichoke hearts.
- Middle Eastern – Olive oil and za’atar spice blend topped with fresh cheese.
Sourdough Pizza Crust Directions
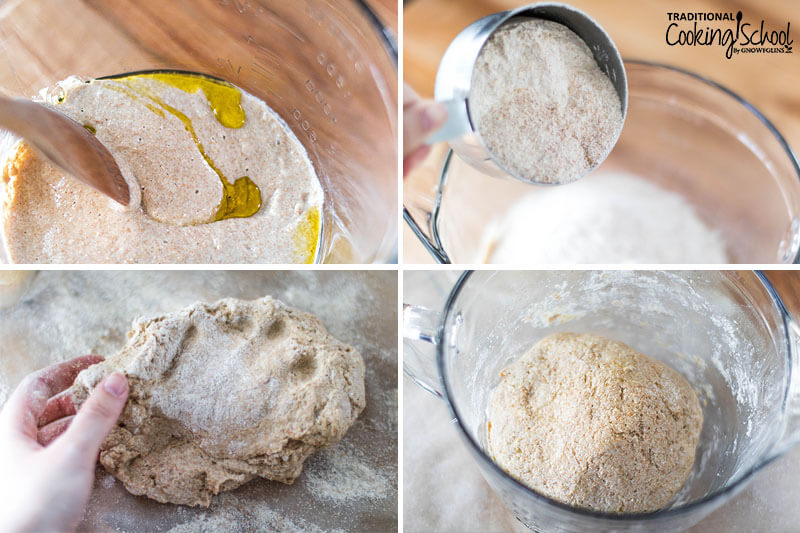
- The morning of the evening you’d like pizza, combine sourdough starter, water, oil, and salt in a mixing bowl. Stir.
- Add flour to the mixture. Mix well.
- Sprinkle your counter with flour or lay down a sheet of parchment paper. Place dough mixture on top and begin kneading, adding flour as necessary.
- Knead until you have a dough that is soft and not sticky. If you find your dough is too wet, add more flour. If it is too dry, add more water or sourdough starter.
- Once dough is soft and smooth, place it into a lightly greased mixing bowl (we use oil to prevent dough from sticking to the bowl). Then cover the bowl with a tea towel or plate, and leave to sour till the evening (this is the bulk fermentation process).
- Or, let dough rest for 30 minutes, then roll it out, shaping the dough, and leaving it to sour as an unbaked crust ready to go. Cover it with plastic wrap to keep it from drying out.
Sourdough Pizza Directions
- Once the souring time is over, preheat the oven to 450 degrees Fahrenheit. (If you have a pizza stone, preheat it here!)
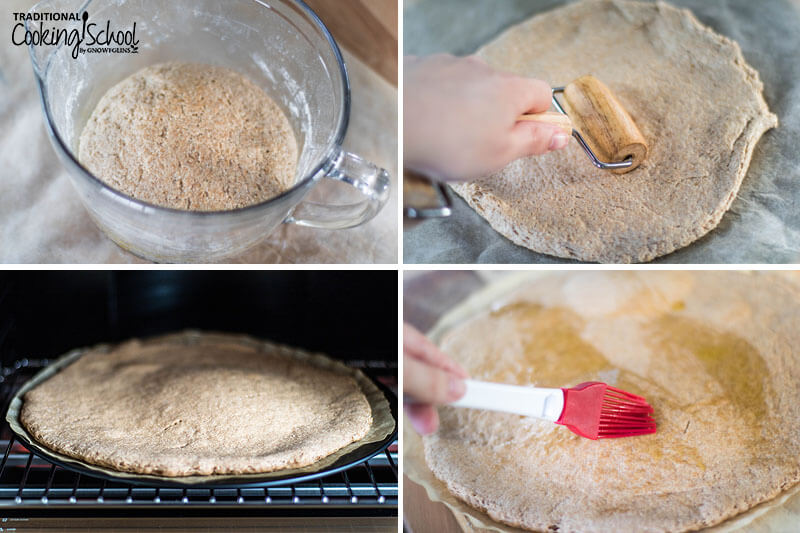
- If you haven’t already, remove the dough from the bowl and roll it out, stretching the dough to form your crust. Either keep it as one ball for a thick crust pizza or divide the dough in half and roll the smaller dough balls out for two thin-crust pizzas.
- Next, poke rolled-out dough several times with a fork to keep dough from bubbling up while baking.
- Pop crust(s) in the oven for about 5 minutes while keeping an eye on it. Don’t let it get too dark. This is just the pre-bake.
- Take the pizza out of the oven (using something like a pizza peel is helpful here).
- Brush with olive oil (this helps keep the sauce from making the dough soggy).
- Add your favorite sauce and toppings!
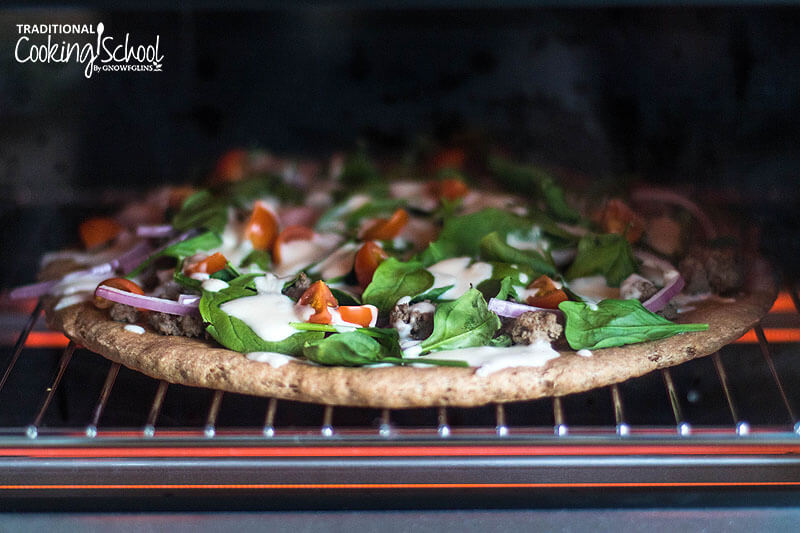
- Place back in the oven for 10 to 25 minutes, until cheese is browned and bubbly. I like to do this bake directly on the oven rack to create an extra crispy crust!
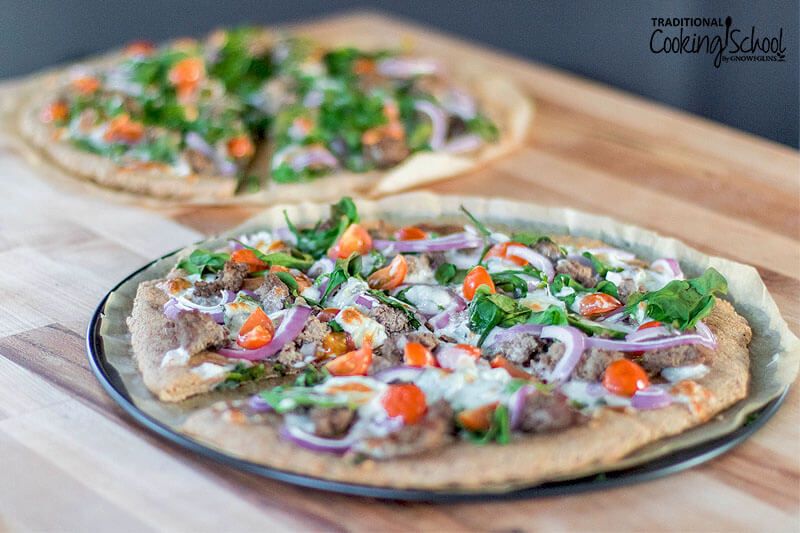
- Remove and slice. For a special touch, sprinkle with fresh herbs. Enjoy!
Tips And Tricks
I feed my starter the night before the morning I want to prepare the pizza dough. This ensures that I will have enough happy ready-to-go starter for the recipe and some left-over for future sourdough adventures.
I usually feed my sourdough starter a ratio close to 1:1 (flour/water). Depending on what I am making, I may use more flour for a thicker starter. For this recipe, it doesn’t matter how you feed your starter. You will correct any consistency deficiencies while kneading.
I like to do my second bake directly on the oven rack (I might turn down the heat depending on the number of toppings). This creates a deliciously crispy crust. Because the crust is pre-baked, it slides easily off the cookie sheet and onto the oven rack. Once the pizza is finished, I slide it back onto the cookie sheet for easy cutting.
How To Make Thin Crust Pizza With This Recipe
This recipe will work for thick or thin crust. What’s your preference? Roll out your dough accordingly… either as one dough ball for thick crust or split in half for two thin crusts!
Can You Freeze Sourdough Pizza Dough?
After pre-baking your crust(s), you may opt to cool and freeze them to enjoy later for a quick weeknight dinner!
How to Make Dough Ahead of Time
For ready-to-use dough, follow steps 1-5 above. Transfer the dough to a zip-top bag, or store in the same bowl, covered with plastic wrap, in the refrigerator until a few hours before baking. Remove the dough from the fridge, allow the dough to come back up to room temperature, then stretch or roll the dough out and proceed.
How To Store Leftover Pizza
Store in an airtight container in the fridge. Eat within a few days.
How To Reheat Pizza
To best mimic that freshly-baked, crispy sourdough crust, I recommend popping your leftover pizza back in the oven on a baking sheet. Bake at 350 degrees Fahrenheit for 20 minutes or so until pizza is warmed through and cheese is melty again.
Other Sourdough Recipes
- Gluten-Free Sourdough Pizza
- Whole Grain Sourdough Bread (einkorn, spelt, or whole wheat)
- Sourdough Waffles With Fermented Strawberries & Yogurt Cheese
- Whole Grain Sourdough Waffles
- Sourdough Lavash: A Traditional Armenian Flatbread
- Sourdough Pesto Pizza
Did you make this sourdough pizza crust recipe? If so, please give us a rating on the recipe card below. Then snap a photo and tag us on social media so we can see your pizza and topping variations!

Sourdough Pizza
Thick or thin crust, delightfully flavorful and crispy, this homemade sourdough pizza crust is easy to make and loaded with your favorite toppings! Plus, you can freeze it for a make-ahead dinner on busy weeknights!
Ingredients
-
1
cup
sourdough starter
fed 12 hours before -
1/2
cup
pure water -
1-1/2
tablespoons
extra virgin olive oil -
1
teaspoon
sea salt -
1 to 1-1/2
cups
flour of choice
einkorn, spelt, whole wheat, etc. -
toppings of choice
meat, cheese, veggies, etc
Instructions
The morning of the evening you’d like your pizza…
-
Combine sourdough starter and water into a medium-sized mixing bowl. Stir.
-
Add oil and salt. Stir.
-
Then add 1 to 1-1/2 cups of flour to the mixture.
-
Mix well.
-
Next, sprinkle your counter with flour.
-
Place dough mixture on top and begin kneading.
-
Add flour as necessary.
-
Then knead dough until all ingredients are happily combined.
-
Remember, you are looking for a dough that is soft and not sticky. If you find your dough is too wet, add more flour. If it is too dry, add more water, starter, or whey.
-
Once dough is complete, place dough ball back in the (lightly-greased) bowl, cover with a plate, and leave to sour till the evening.
Or…
-
Let dough rest for 30 minutes, then roll it out, and leave it to sour as an unbaked crust ready to go. Cover it with plastic wrap to keep it from drying out.
Once it’s time to bake the pizza…
-
Preheat oven to 450 degrees Fahrenheit or hotter for the pre-bake. (If you have a pizza stone, preheat it here!)
-
While the oven is preheating, if you haven’t already, roll out your dough.
-
Poke rolled-out dough several times with a fork.
-
Then pop it in the oven for about 5 minutes while keeping an eye on it. Don’t let it get too dark. This is just the pre-bake.
-
Take the pizza out of the oven.
-
Cool and freeze for not-immediate baking or brush with olive oil and add your favorite toppings!
-
Bake your decorated sourdough pizza for 10 to 25 minutes depending on oven temperature, toppings and crust thickness.
-
Enjoy!
Recipe Notes
*I feed my starter the night before the morning I want to prepare the pizza dough. This ensures that I will have enough happy ready-to-go starter for the recipe and some left-over for future sourdough adventures.
*I usually feed my sourdough starter a ratio close to 1:1 (flour/water). Depending on what I am making, I may use more flour for a thicker starter. For this recipe, it doesn’t matter how you feed your starter. You will correct any consistency deficiencies while kneading.
*This recipe will work for thick or thin crust. What’s your preference? Roll out your dough accordingly.
*I like to do my second bake directly on the oven rack (I might turn down the heat depending on amount of toppings). This creates a deliciously crispy crust. Because the crust is pre-baked, it slides easily off the cookie sheet and onto the oven rack. Once the pizza is finished, I slide it back onto the cookie sheet for easy cutting.
Calories from Fat 18
This post was originally published and written by Erin Vander Lugt on 6/10/10. It was updated and republished on 3/10/21.


