
Fresh, tart, and effervescent, milk kefir is a living food teeming with beneficial bacteria and yeasts for gut health! This ultimate guide to all things dairy kefir will answer your burning questions — how to make it, which milk to use, what to do if it’s too sour… plus troubleshooting and my 3 best culturing tips!

Milk kefir reminds me of yogurt, labneh (yogurt cheese), and other Middle Eastern flavors from my childhood.
The best part?
Even though we recommend starting with raw, pastured milk from a local dairy, you can take regular pasteurized milk from the store and transform it into a nutrient-dense, fermented food that is *so much better* than before!
We’ve been teaching TCS premium members how to make milk kefir at home for over a decade now, and along the way we’ve accumulated quite the list of FAQs, like…
- Which milk to use?
- How long to ferment?
- What should I do if my kefir is too sour?
- Is it different than water kefir?
- Is it different than yogurt?
- And sooooo many more!
So, in the same spirit as our ultimate guides to Kombucha and water kefir, we’ve put together the ULTIMATE milk kefir guide to answer all of your burning questions, help you troubleshoot, and share brewing tips!
Let’s dive in…
Table Of Contents
What is milk kefir?
Milk kefir, also known as dairy kefir, is a yogurt-like cultured dairy product made from milk and the “mother culture”: kefir grains.
These grains are home to symbiotic colonies of beneficial microorganisms — bacteria and yeasts — that are able to colonize the digestive tract, boosting gut health.
When you introduce a dairy kefir grain into any kind of milk, even a non-dairy milk like coconut milk, the microorganisms feast on the lactose (milk sugar), and as a result of this process, create a thickened milk with the consistency of thin, drinkable yogurt.
The beneficial organisms from the grains have spread throughout, giving a wonderful probiotic boost to the drinker! It actually has more probiotics than yogurt!
Kefir is low in lactose, while rich with beneficial bacteria and yeast, and high levels of vitamins, minerals, and enzymes. This fermented milk drink can be enjoyed plain, or used in a variety of recipes from potato salad to popsicles (see more ideas below!).
According to The Body Ecology Diet, kefir has many health benefits. It…
- is a natural antibiotic
- does not feed yeast, such as candida
- can be tolerated by those who are lactose intolerant because the beneficial organisms eat most of milk’s lactose
- provides the enzyme lactase to digest any remaining lactose
- coats the lining of the digestive tract, creating a nest for beneficial bacteria to colonize
What are kefir grains?
Before we start making kefir, let’s discuss the kefir grain or culture. You need to know this so when it comes time to retrieve the kefir grain from the cultured milk, you will know what to grab!
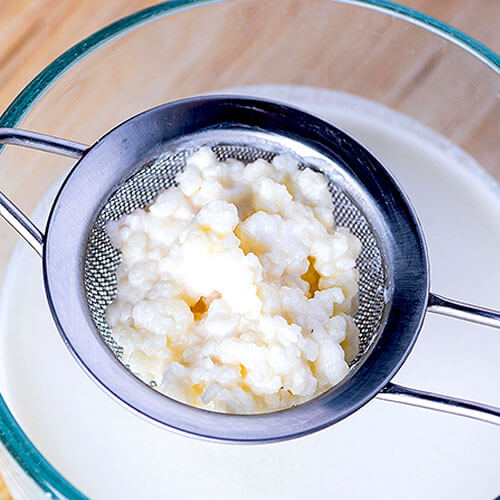
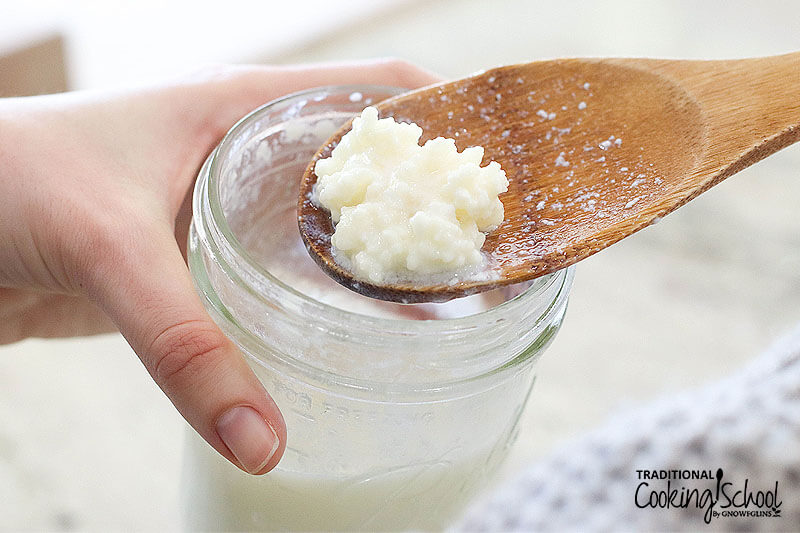
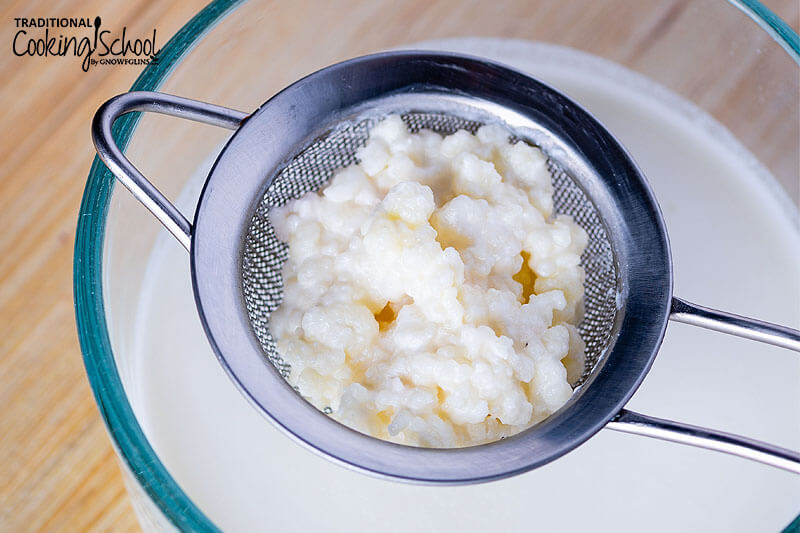
Kefir grains are a rubbery, somewhat translucent whitish/yellowish clump, and shaped like a cauliflower. These grains contain bacteria and yeast growing together, along with casein (milk proteins) and lactose (milk sugar).
They can be as small as a grain of wheat or quite large, like a hazelnut. You need only 1 to 2 tablespoons of kefir grain(s) to culture a quart of milk.
During culturing, the grains will be mixed in with the kefir itself, yet they are different and unmistakable, so don’t fear losing the grain. It can be found!
The kefir, when pressed with a finger, will collapse; its curds are fragile. Pressing on the grain feels rubbery and it springs back when released.
Milk Kefir Vs. Water Kefir
Milk or dairy kefir is not the same as water kefir.
In both types of kefir, the grains feed on sugar, leaving behind an acidic, fermented, slightly alcoholic (less than 1%), probiotic-rich beverage. Dairy kefir grains feed on the milk sugar lactose, while water kefir grains feed on whatever sugar is used in the sugar-water base.
They do both have a mother culture called “grains”, which are colonies of bacteria and yeast living together symbiotically. However, because the microbes vary in each culture, they look different.
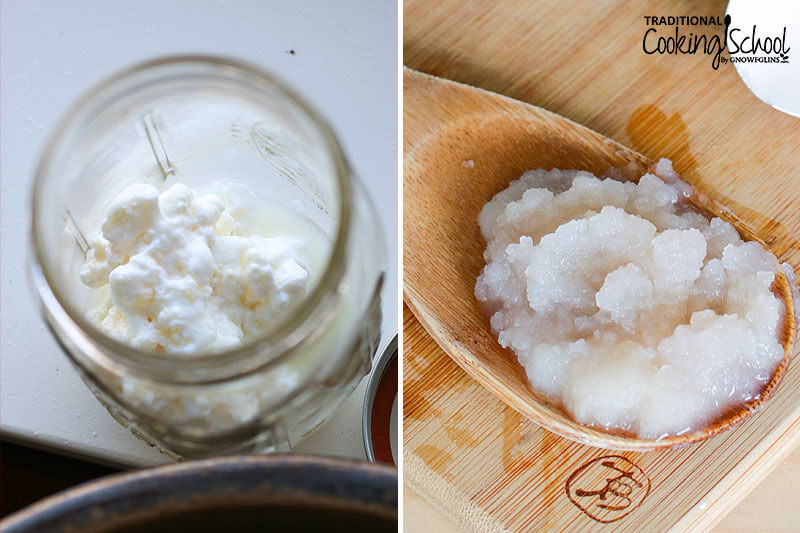
As mentioned above, dairy kefir grains are rubbery, whitish clumps that look like cauliflower. Water kefir grains are somewhat translucent crystals or sharp little pebbles and remain separate from each other.
Of course, the most obvious difference between them both is… the dairy! Water kefir is dairy-free, dairy kefir is not.
And guess what? You can actually use dairy kefir grains to make water kefir through a conversion process.
The same grains won’t work indefinitely, but since dairy kefir grains grow like gangbusters in milk, if you keep them going in milk on the side, you’ll have an endless supply — without investing in water kefir grains!
Learn how to make water kefir here!
Milk Kefir Vs. Yogurt
If you’re new to cultured dairy, you might be wondering whether you should make milk kefir or yogurt, or if it really matters! Both are fantastic cultured foods, however, they do have their differences.
Kefir is a thickened milk with the consistency of thin, drinkable yogurt. Its mother culture, kefir grains, are responsible for culturing milk into kefir.
It is typically more tart than yogurt, and actually has a far greater number of beneficial bacteria as well (almost five times more), in addition to yeasts!
These microorganisms are able to colonize the digestive tract, boosting gut health and keeping the colon clean. Some of the beneficial yeasts are especially powerful as they help the body resist pathogens and parasites. (Source.)
Yogurt is typically made in a warm location such as a yogurt maker, where its unique starter culture thickens milk into a spoonable consistency. In addition to being thicker, it has a milder flavor than kefir, and its probiotics pass through the gut (rather than colonizing it), providing food for the good bacteria there.
As you can see, both have their own special qualities! You really can’t go wrong, whether you make one and not the other, or both.
Learn how to make Instant Pot yogurt here!
3 Culturing Tips & Tricks
Here are three tips for keeping your dairy kefir grains happy!
No worries, though. They are much more robust than water kefir grains, and it’s pretty easy to help them thrive.
1. The Best Milk
With cultured dairy, you can actually end up with a food that is better than how it began!
Of course, the best kefir will result from starting with fresh, raw milk from pastured cows, goats, or sheep. But if you don’t have access to that, choose the next best milk you can and be assured that culturing it will make it very good for you.
In order of preference, the best dairy foods come from these forms of milk.
- raw, whole milk from a pastured animal
- non-homogenized, pasteurized whole milk from a pastured animal
- non-homogenized, pasteurized whole milk from a grain-fed animal
- homogenized, pasteurized milk (whole is better than skimmed)
- ultra-pasteurized milk (whole or skimmed) (not recommended for culturing*)
*The fifth milk listed, ultra-pasteurized (UHT) milk, doesn’t always work for culturing because excessive processing often renders it incapable of supporting a culture.
For the dairy-intolerant, full-fat coconut milk can be used to make “dairy” kefir. See coconut milk kefir instructions here.
2. The Best Tools
Choose non-reactive utensils and containers. This means glass jars and wood or stainless steel utensils and strainers.
Avoid plastic containers because, over time, the acidity of the beverage can cause the plastic to leach into the drink.
If you’re going to use stainless steel, keep its contact with the grains to a minimum — quick stirring or straining rather than prolonged contact. (Stainless steel is the least reactive of the possible metals you will find in kitchen utensils.)
I discourage using a cotton muslin bag for this type of kefir. It really makes a mess!
3. The Best Environment
Brew the dairy kefir several feet away from other cultures, to prevent cross-contamination.
Dairy kefir needs an environment around room temperature to ferment well. Ideal room temperatures are between 70 and 80 degrees Fahrenheit.
The fermentation process will be longer with the cooler temperatures and faster with warmer temperatures.
When milk kefir ferments too long, you can tell because it will separate into curds and whey. Yes, just like Little Miss Muffet!
It will also have a strong sour flavor that can be too much for some tastes. And of course, the texture is not what you were expecting either.
Over-fermented kefir hasn’t necessarily gone bad… but letting it get to this point should be avoided because it may not be pleasant to eat. Here are ways to use it up so it doesn’t go to waste!
Rehydrating The Grains
Unless someone shares grains with you, you’ll have to purchase dairy kefir grains. (We recommend getting them from Cultures for Health.)
Re-hydrate according to the package directions. It takes 4 to 7 days in milk to re-hydrate them and get them going again.
But, according to Cultures for Health, this process may take 2 to 4 weeks.
How To Store Milk Kefir Grains
Dairy kefir grains may be stored, when not in use, in the refrigerator in a small amount of milk. This will keep for one or two weeks.
If stored much longer, I recommend draining the liquid and replacing it with fresh milk. People report 50% viability results with freezing dairy kefir grains, so I recommend freezing several grains to ensure a backup.
You may also dehydrate grains for future use (or backup). Here is a step-by-step tutorial.
Once dry, store in the refrigerator or freezer.
Instructions For Making Milk Kefir
- Put 1 quart of the best milk you can buy into a wide-mouth quart size jar. This milk may be warm from the milking, or cold from the refrigerator. I’ve made kefir with goat milk and cows milk, and both are delicious! If you’re dairy-free, you can even make coconut milk kefir!
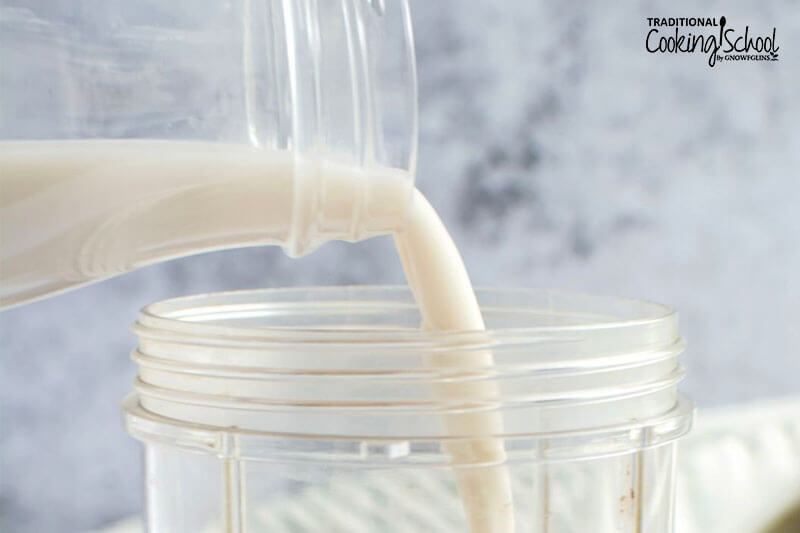
- Add (hydrated) dairy kefir grain(s) and stir briefly and gently with a wooden spoon. Use 1 to 2 tablespoons of grain(s) per quart of milk.
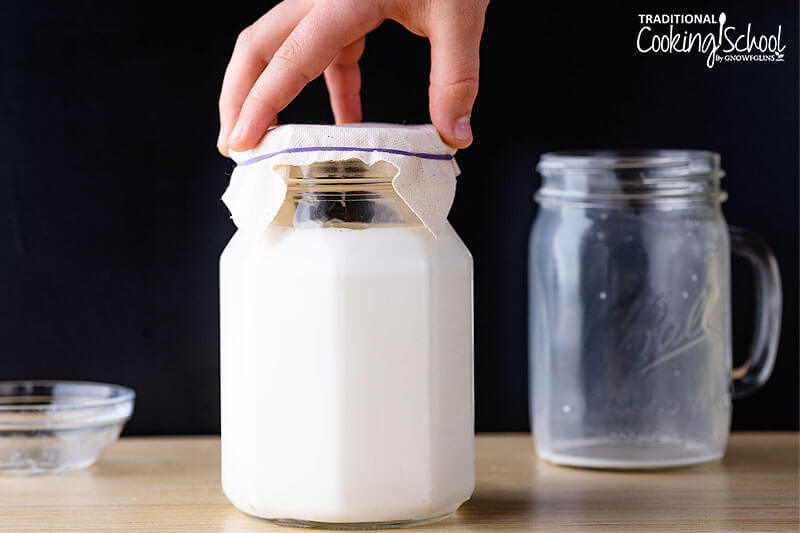
- Cover with a cloth napkin or paper towel and secure with a rubber band. Leave at room temperature to ferment the milk away from other cultures.
- Let culture until you are happy with how thick and sour it is. It will get thicker and sourer over time, as well as more effervescent. Eventually, its thickening will turn it into curds and whey. During long or warm culturing times, you might see threads of yellow liquid surrounding the kefir curds; this is the beginning of this separation.
- In cooler temperatures, the culturing process is slower. In warmer temperatures, it happens more quickly. If your jar of culturing kefir is in a warm place, such as near an oven vent, slow cooker, or toaster oven, it will culture more quickly.
- In general, 18 hours to 2 days is about what you can expect for the brewing time. It will be affected by your preferred thickness, taste, and the temperature of the room.
- In about 6 to 24 hour intervals, you can take a wooden spoon and gently “poke” down into the milk, at the sides of where the grains are. You can see where the grains are because they tend to float at the top, and they are bumpy whereas the milk is smooth.
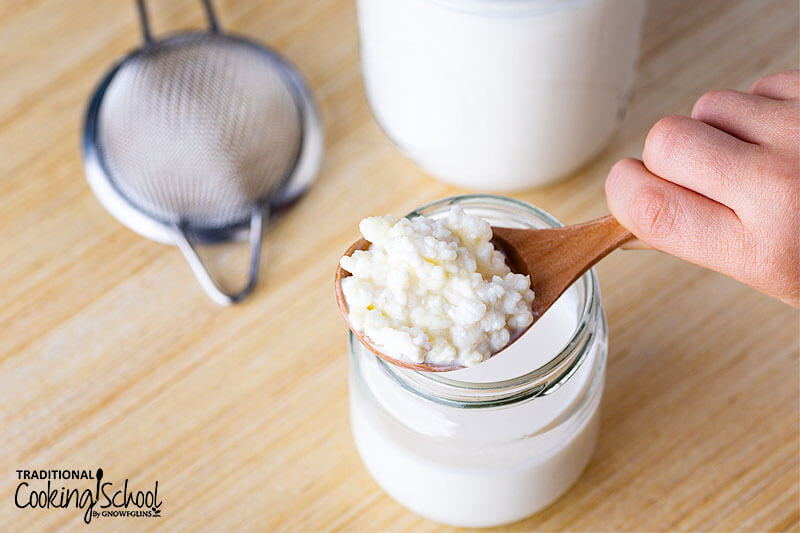
- Or you can stir gently. Frequent, but gentle stirring helps to achieve a smooth consistency, especially when trying to achieve a thick consistency.
- When you’re happy with the kefir’s taste and thickness, retrieve the grain(s) with a wooden spoon. You should be able to tell where they are based on the bumps in the kefir.
- Transfer the kefir grain(s) to a new batch of milk, or store in the refrigerator until needed (following instructions for storage above).
- You can also choose to separate the kefir from the grains using the strainer method. Set a strainer over a jar or bowl and pour the kefir into it. Let the kefir drip out over several minutes; also stir gently to help the liquid move out.
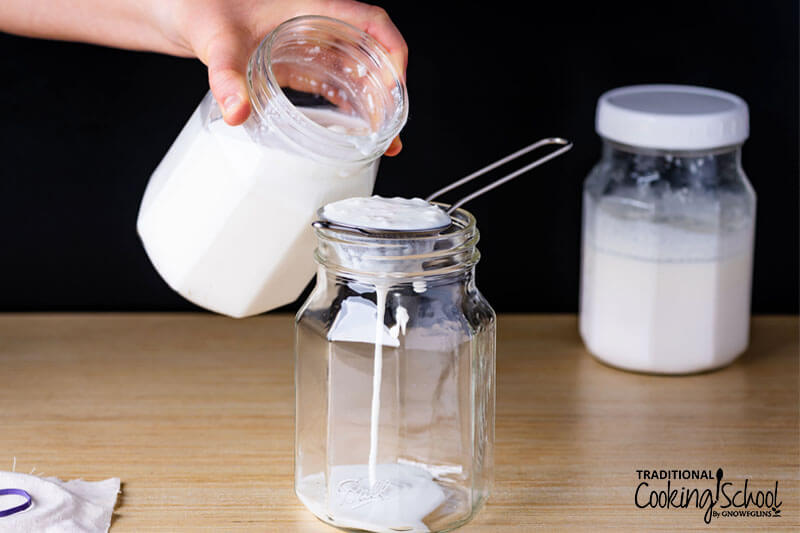
- Cover the finished kefir and refrigerate. Or let sit out at room temperature for 12 to 24 hours to develop carbonation, and then refrigerate. Enjoy!
Troubleshooting & FAQs
Let’s run through the most common dairy kefir issues and questions!
Can I Switch Milk?
Yes! If switching grains from one type of milk to another (such as from cow milk to goat milk), it may be helpful to make kefir the first few times with only 1 cup of milk.
This allows less waste of milk if it takes a few batches for the grains to acclimate to the milk. Follow the same instructions as for rehydrating when acclimating grains to new milk.
Also, if you get hydrated dairy kefir grain(s) and wish to use for non-dairy kefir, give the grain(s) a rinse before using in non-dairy milk.
Why Isn’t My Kefir Culturing?
It hasn’t fermented at all or hasn’t fermented long enough. No fermenting = no kefir. Give it more time and/or move it to a warmer spot to encourage those bacteria and yeasts to get to work.
It isn’t warm enough. Milk kefir ferments best at a temperature between 70 and 80 degrees Fahrenheit. Give the beneficial microorganisms a boost by relocating them to above your fridge or oven, to an upstairs room, or to a high shelf.
This is also when you might find a seedling warming mat handy!
The grains have been contaminated by another culture. If you’ve exhausted all other reasons for why your grains have stopped working, you may be dealing with cross-contamination.
Signs of cross-contamination include your grains changing texture or color for seemingly no reason, or if they stop culturing milk into kefir and no other conditions (milk, temperature, location, etc.) have changed.
If this is the case, rinse the grains well in pure, uncontaminated water before putting them into a new batch of milk to culture. This is only as a last resort — keep rinsing to a minimum.
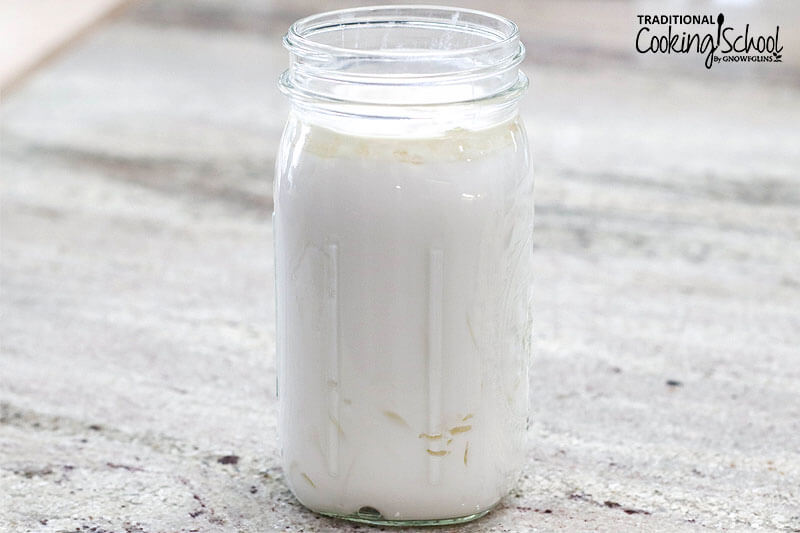
My Kefir Is Too Thin?
My family prefers thicker kefir, almost as thick as Greek-style yogurt. Here are three ways to achieve thicker kefir…
Let it ferment longer. Like all cultured dairy, kefir gets thicker and thicker the longer it ferments. The beneficial organisms produce acids as they digest the milk sugar, and these acids thicken (aka “curdle”) the milk.
So, let it go longer! It will eventually turn into curds and whey — don’t let it go that far.
In the summer, my kefir is done (for our preference) after about 24 hours or less. In the winter, 48 hours produces the kefir we like.
Gently rocking the jar and a taste test tells me that it is done. I am looking for thick milk (thicker than buttermilk and almost as thick as yogurt) and a fresh, slightly sour flavor with some effervescence.
Although this method does yield thicker milk kefir, some people don’t care for the extra sourness. That’s why method #2 is a great option, too!
Drip it through cheesecloth. Drip your 24-hours-old (or so), mild, thinner kefir through 2 layers of 90-count cheesecloth. You can also use pillowcase-weight cotton cloth.
After a couple of hours, you’ll have thicker milk kefir! If you let it drip for a day, you’ll have kefir cheese. Choose a time frame that results in the consistency you want.
Gently stir every 6 hours while it is culturing (at least during the day time). This helps achieve a more uniform, thick consistency.
Why Did It Separate?
Here are a few reasons this could happen.
It fermented too long. Allowing your kefir to ferment for longer than necessary (24 to 48 hours) means that the whey can spill out of the curds. There’s nothing wrong with this, except it can have a more sour flavor and texture-wise isn’t as pleasant to drink.
Shake the separated kefir well before using, to help it mix together, and make sure to stop the ferment earlier with your next batch.
The temperature is too warm. Culturing happens much more quickly at warm temperatures.
The signs of over-culturing due to temperature are the same as above: kefir that has separated into curds and whey, with a strong, sour taste. Move it to a cooler place if possible.
Also, stop the fermentation process sooner.
You don’t have to toss the over-fermented kefir, however! Here are my best ideas for using it up so it doesn’t go to waste!
My Kefir Tastes Too Sour?
This is an easy fix!
It fermented too long. Again, allowing your kefir to culture too long means the flavor is stronger, “cheesier”, and it may separate into curds and whey, as well.
Stop the culturing earlier with your next batch.
You aren’t using fresh milk. Kefir, as well as yogurt, cheese, and anything cultured, tastes better if the milk is very fresh, so I prioritize doing most of my culturing within a few days of milk pickup (even if we’re not going to eat it right away).
Why Aren’t My Grains Growing?
They’re running out of food. Dairy kefir grains aren’t as sensitive as water kefir grains, but they do need food in the form of lactose to grow.
Keep to a normal routine, as detailed in this post, to make sure your grains are healthy and fed!
They’re still acclimating to a change of conditions (milk, temperature, location). In my experience kefir grains do multiply quickly, but they go in spurts, too.
It is likely they’re still acclimating to your milk or just taking a breather. If they’re working fine, don’t worry about it.
My Kefir Grains Aren’t Floating?
I normally teach that kefir grains will float to the top… but this isn’t the case for everyone! Here’s why (hint: there’s probably nothing wrong).
The grains are heavier. Kefir grains that aren’t fully re-hydrated from being dehydrated aren’t as buoyant as older grains that are fully plumped up.
It can take weeks or months for dried grains to fully re-hydrate. (Which is okay, because you can still be making kefir all that time.)
How Do I Find My Missing Grains?
Kefir grains that aren’t floating readily at the top can be hard to find. Yet remember, kefir curds collapse when touched whereas grains feel rubbery and spring back when released.
You can fish the grains out of your finished kefir with a spoon, or pour the kefir through a strainer until you find the grains. I look for little bubbles at the top or bottom of my jar, where the grains are pressed up against the glass.
Has My Kefir Gone Bad?
Milk kefir, like yogurt and other cultured dairy, lasts longer than you might think!
In the fridge, the kefir activity slows down, yet the culture keeps working (albeit slowly) so the kefir will get more and more sour and “cheesy”.
As long as it doesn’t smell rotten then it can be eaten. Although most people won’t care for it when it smells or tastes this strong, I do have ideas for how you can use it up without it being too noticeable!
If the kefir ever develops mold on top, it’s possible that could be skimmed away and the rest is fine. (A smell and/or little taste will tell you for sure.)
In a nutshell, kefir lasts one to two days at room temperature, two to three weeks (or longer) in the fridge, or one to two months (or longer) in the freezer. See this article for more information.
Why Is It Slimy Or Stringy?
Kefir has gel-forming properties, and in certain conditions, slimy or string dairy kefir can occur.
The temperature is especially warm. Try to find a cooler location for the kefir to culture, and give it a few batches to adjust.
There are a lot of grains for the amount of milk you’re using. Decrease the amount of grains you’re using. Remember, you need only 1 to 2 tablespoons per quart of milk.
Or, if your grains are really hiding, search through the kefir in small batches as explained in this post on how to find kefir grains.
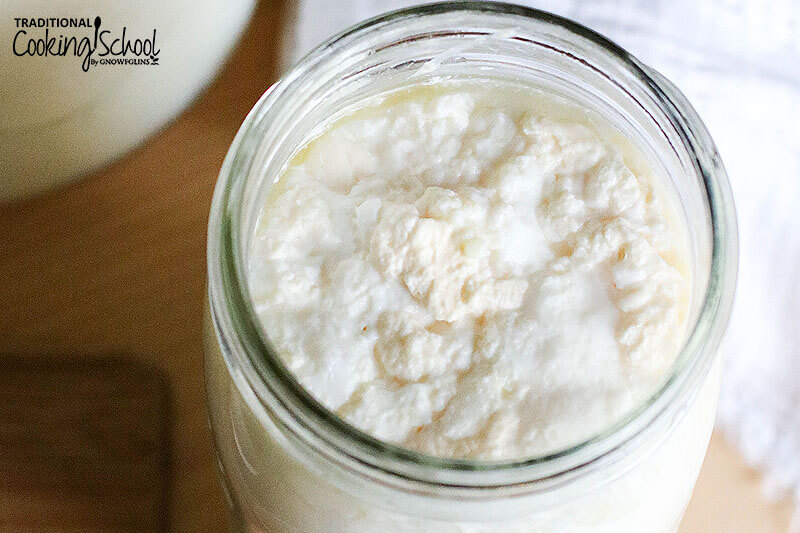
Why Is There A Thin White Or Light Brown Layer On Top?
This is a development of certain yeasts with access to oxygen; it is not mold, and not pathogenic. It is caused by a few things…
Over-fermentation of a batch or many batches over time. Re-balance microbial activity of the kefir grains by decreasing the culturing time.
Too many grains for the amount of milk. Reduce the amount of grains you’re using — down to only 1 to 2 tablespoons per quart of milk.
The temperature is warm. Find a cooler location for the culture.
Uses For Dairy Kefir

Well, you can always drink kefir… 😉 Besides that, here are some ideas!
- Use it as the acidic medium for soaking grains, like you would with Kombucha or raw apple cider vinegar.
- Make Middle Eastern kefir cheese balls.
- Boost your salad dressings with a hefty dose of probiotics.
- Make kefir parfaits for breakfast, lunch, or dessert!
- Use it as the liquid base for smoothies.
- Make probiotic ice cream or popsicles.
- Jazz up your favorite potato salad.
Milk Kefir
Fresh, tart, and effervescent, milk kefir is a living food teeming with beneficial bacteria and yeasts for gut health! Recipe easily scaled up or down.
Ingredients
-
1 to 2
tablespoons
milk kefir grains -
1
quart
raw and/or whole milk
ideally raw, but pasteurized is okay
Instructions
-
Put 1 quart of milk into a wide-mouth quart size jar.
-
Add (hydrated) dairy kefir grain(s) and stir briefly and gently with a wooden spoon.
-
Cover with a cloth napkin or paper towel and secure with a rubber band. Leave at room temperature away from other cultures.
-
Let culture until you are happy with how thick and sour it is (about 18 hours to 2 days). It will get more thick and more sour over time, as well as more effervescent. How quickly it cultures will depend on your preferred thickness, taste, and the temperature of the room.
-
In about 6 to 24 hour intervals, you can take a wooden spoon and gently “poke” down into the milk, at the sides of where the grains are. You can see where the grains are because they tend to float at the top, and they are bumpy whereas the milk is smooth.
-
Or you can stir gently. Frequent, but gentle stirring helps to achieve a smooth consistency, especially when trying to achieve a thick consistency.
-
When you’re happy with the kefir’s taste and thickness, retrieve the grain(s) with a wooden spoon. You should be able to tell where they are based on the bumps in the kefir.
-
Transfer the kefir grain(s) to a new batch of milk, or store in the refrigerator until needed (following instructions for storage above).
-
You can also choose to separate the kefir from the grains using the strainer method. Set a strainer over a jar or bowl and pour the kefir into it.
-
Let the kefir drip out over several minutes; also stir gently to help the liquid move out.
-
Cover the finished kefir and refrigerate. Or let sit out at room temperature for 12 to 24 hours to develop carbonation, and then refrigerate. Enjoy!
Recipe Notes
*I’ve made kefir with goat milk and cow milk, and both are delicious! If you’re dairy-free, you can even make coconut kefir!
Dairy Kefir Grain Storage
Milk kefir grains may be stored, when not in use, in the refrigerator in a small amount of milk. This will keep for one or two weeks.
If stored much longer, I recommend draining the liquid and replacing it with fresh milk. People report 50% viability results with freezing dairy kefir grains, so I recommend freezing several grains to ensure a backup.
You may also dehydrate grains for future use (or backup). Here is a step-by-step tutorial.
Once dry, store in the refrigerator or freezer.
Calories from Fat 36

For more information about kefir and other cultured foods, check out our Cultured Dairy & Cheese eCourse, as well as our many free resources:
- 8 Yummy Ways To Eat Kefir
- Kefir Grains Or Kefir Powder: Which Is Better? #AskWardee 040
- How Do I Know If My Kefir Grains Aren’t Good Anymore?
- My Kefir Looks _______! Are My Kefir Grains Okay?
- How To Dehydrate Kefir Grains
- How to Make Coconut Kefir {3 Ways} #AskWardee 002
Do you know how to make milk kefir? How do you like to eat or drink it?
This post featured in 39 Nourishing Postpartum Freezer Meals To Prepare While You’re Pregnant.
This post was originally published and written by Wardee Harmon on 6/1/09. It was updated and republished on 9/18/20.


